Figures & data
Fig. 1. Map showing locations of East Midlands sites mentioned in the text
Drawing and copyright authors
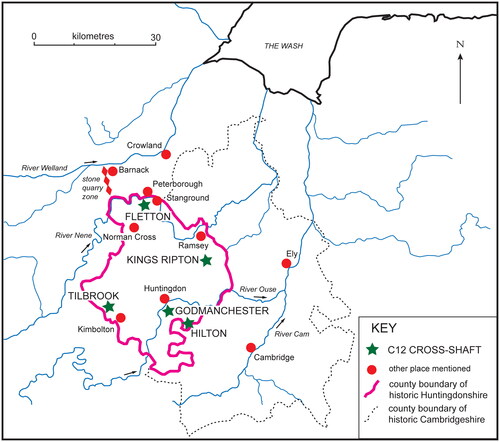
Fig. 2. The ‘Radulfus Cross’, Fletton: reconstruction of original monument from four known stones
Drawing: Dave Watt, copyright authors
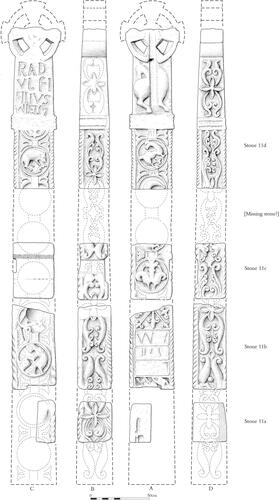
Fig. 3. The ‘Radulfus Cross’, Fletton. The upper part of the cross today
Photos and copyright authors
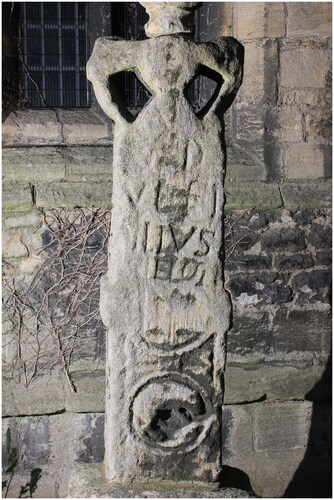
Fig. 4. Mid-12th-century sculpted roundels from architectural contexts: a) Ely Cathedral, Prior’s Door, jambs; b) Canterbury Cathedral, Green Court gatehouse, roundels in outer order; c) York, St Margaret Walmgate, south door—drawing of 1790, engraved 1791 by John Carter; d) Conisbrough, coped and sculpted grave-cover—drawing by John Carter; e) York, voussoirs thought to come from All Saints church, Pavement and now in the Yorkshire Museum a) Photos Zarnecki, Ely Cathedral, pls 84, 87, 89, 90, 92 b) Photos Fergusson, Canterbury Cathedral Priory, pls 96, 97 c) J. Carter, Specimens of Ancient Sculpture and Painting (London 1780–87), II, between 34 and 35 d) Carter, Specimens, II, between 52 and 53 e) Photo RCHME, Inventory of the Historical Monuments of the City of York Vol. IV. Outside the City Walls East of the Ouse (London 1975), pl. 28
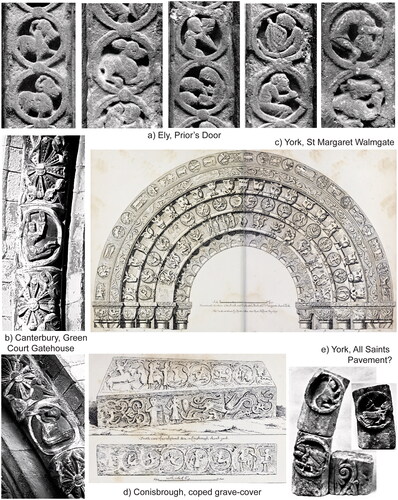
Fig. 5. The Kings Ripton cross fragment: a) broad face A; b) right-hand narrow face B; c) left-hand narrow face D
Photos and copyright authors
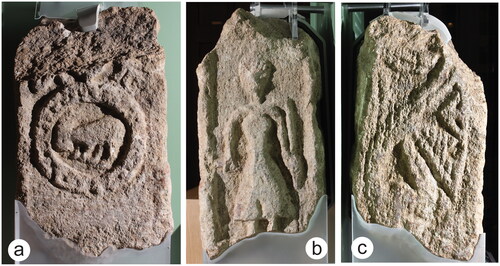
Fig. 6. Figure of Temperancia in glass from the oculus in the north wall of the north transept at Canterbury Cathedral
Caviness, Windows, pl. 12 No. 30. Photo and copyright Corpus Vitrearum Medii Aevi
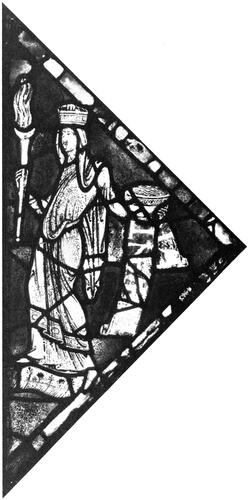
Fig. 7. Proposed original setting of Kings Ripton cross, based on Hart, ‘Foundation of Ramsey Abbey’, fig. 3 with additions
Drawing and copyright authors
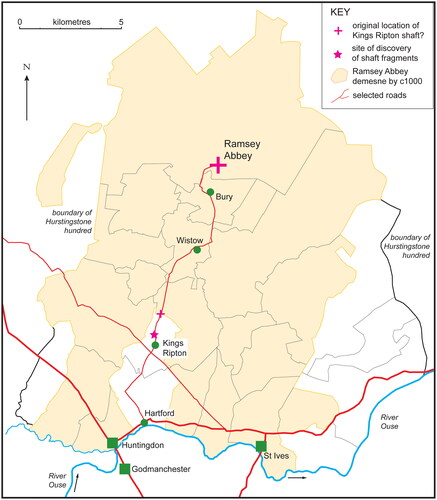
Fig. 8. The Godmanchester cross: the only known image of the monument From The Church Builder, 37 (1871)
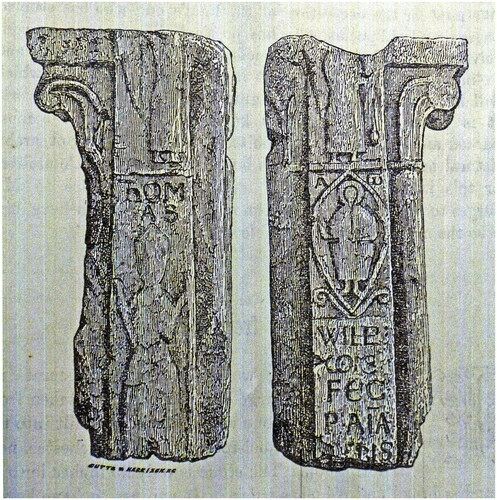
Fig. 9. The Godmanchester cross: reconstruction based on
Drawing: Dave Watt, copyright authors

Fig. 10. The Godmanchester cross: suggested original location as market cross
Drawing and copyright authors
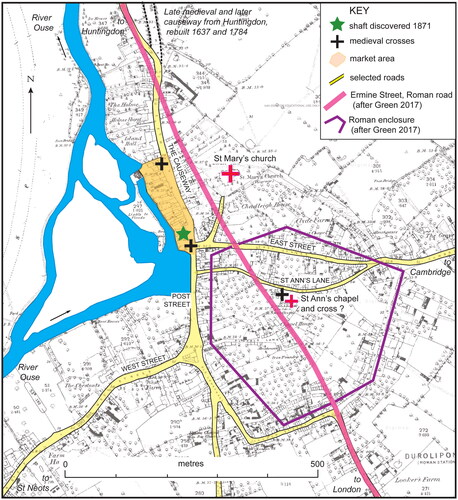
Fig. 11. The Tilbrook/Kimbolton cross: a) the remains of the cross today; b) detail of bishop, showing the careful chisel damage to mouth
Photos and copyright authors
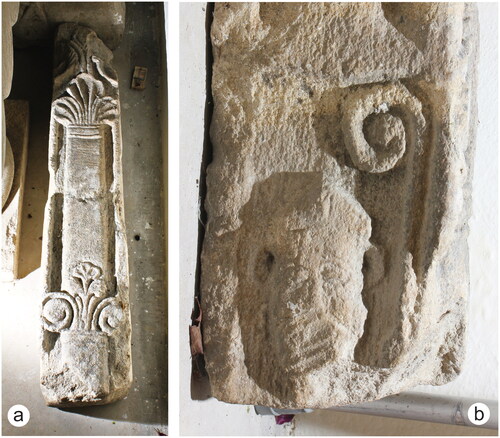
Fig. 12. The Tilbrook/Kimbolton cross: reconstruction of original monument from two surviving stones
Drawing: Dave Watt, copyright authors
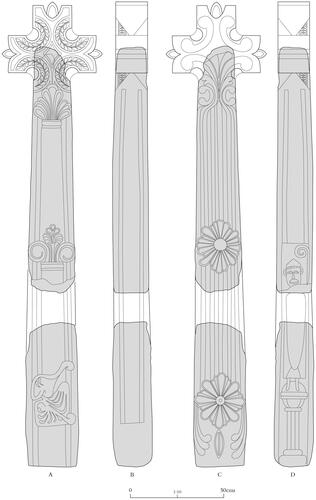
Fig. 13. Tilbrook and Kimbolton. Plan showing features mentioned in the text
Drawing and copyright authors
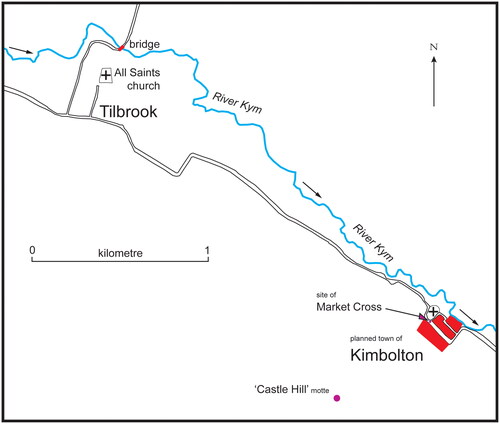
Fig. 14. The Hilton cross fragment: a) surviving broad face A; b) right-hand narrow face B; c) left-hand narrow face D
Photos and copyright authors
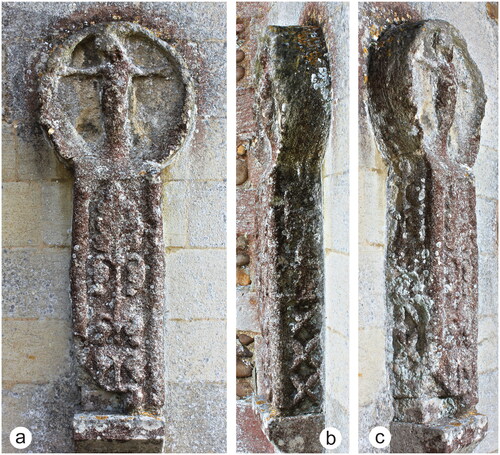
Fig. 15. Cross-head at Kedington, Suffolk. Here argued to be mid-12th century in date
Copyright Corpus of Anglo-Saxon Stone Sculpture
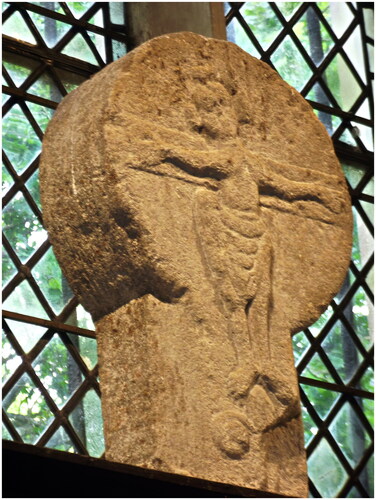
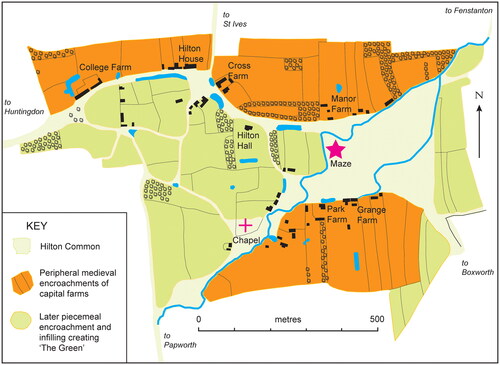
Fig. 16. Layout of Hilton village, redrawn from the estate map of 1778, Cambridge University Library, Maps MS Plans 635, surveyed by John Spyers for Lancelot ‘Capability’ Brown as an appurtenance of the lordship of Fenstanton
Drawing and copyright authors