Figures & data
Figure 1 Study area with mooring locations and weather stations.
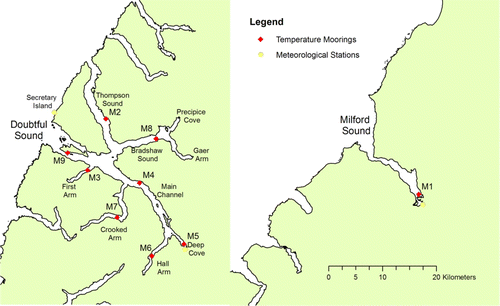
Figure 2 Near-surface (0 to 19 m) water temperature in Milford Sound and Doubtful Sound.
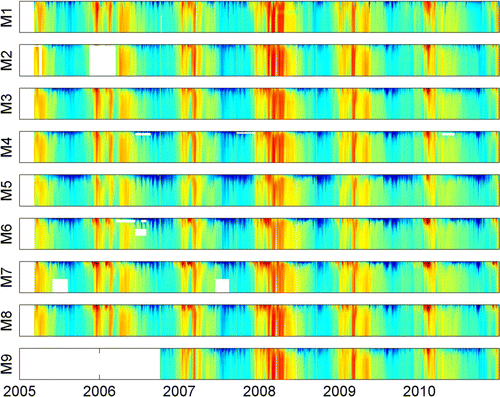
Figure 3 Distributions of seasonal surface (0.5 m), mid (3 m, 5 m) and deeper (19 m) water temperature, from the nine moorings. The 0.5 m sensor resides within the surface layer, 3 m and 5 m are exposed to the surface layer during its periodic deepening events, and 19 m is in the oceanic layer below the extreme deepening of the buoyant surface layer. M5 in Deep Cove is at the top of each stack of nine boxes, then M6 in Hall Arm, M4 in the main channel, M3 in First Arm, M9 in the main channel at Bauza Island is in the middle of each stack, then M7 in Crooked Arm, M8 in Bradshaw Sound, M2 in Thompson Sound, and M1 in Milford Sound is lowest. Vertical line in box is the median of the data, the box spans the quartiles, whiskers span 1.5 times the interquartile range, dots beyond that represent outliers.
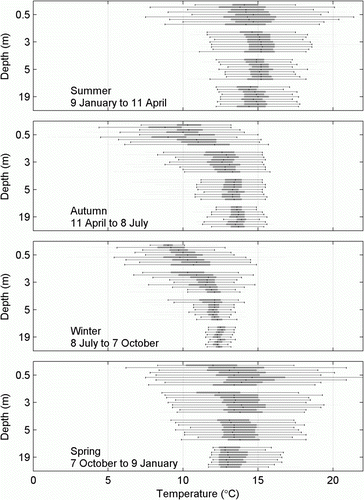
Figure 4 Daily average temperatures of air and water at 0.5 m and 19 m from Milford (M1) and Doubtful (M5) Sounds.
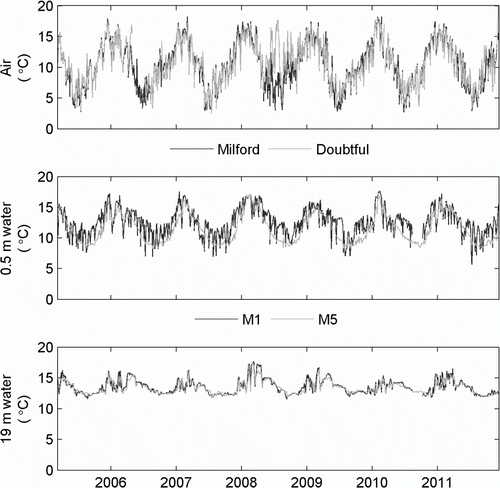
Table 1 Maxima, minima, 1st and 99th percentiles of 0.5 m and 19 m water temperatures throughout Doubtful Sound and in Milford Sound.
Figure 5 Synchronisation between water temperature and weather in Milford Sound and Doubtful Sound.
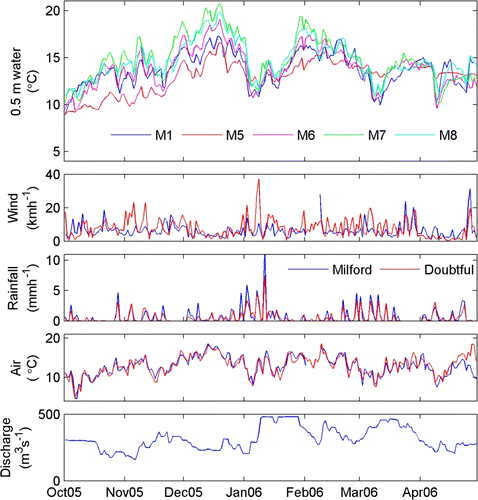
Figure 6 Effect of rainfall on water temperature change at M5, M4, M8 and M1. Top boxes are high rainfall days, bottom boxes are low rainfall days.

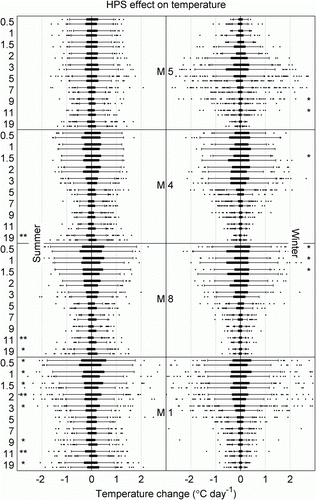
Figure 7 Effect of wind direction on water temperature change at M5, M4, M8 and M1. Left-hand plots show summer, right-hand plots show winter. Within each of the eight subplots the 10 pairs of boxes represent the 10 depths at which temperature was measured, and of each of the 10 pairs the top box shows the distribution of temperature changes during up-fiord wind days and the bottom box shows the distribution for down-fiord wind days. Three asterisks indicate a statistically significant difference between up-fiord and down-fiord with P<0.001, two indicate P<0.01 and one indicates P<0.05.
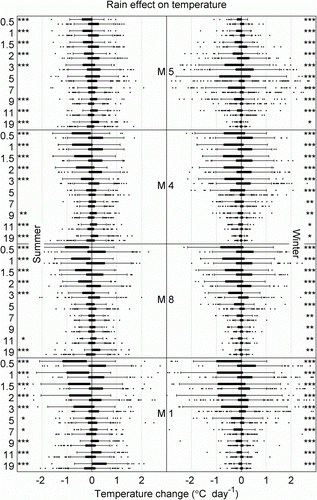
Figure 8 Effect of air temperature on water temperature change at M5, M4, M8 and M1. Top boxes are warm air temperature days, bottom boxes are cool air temperature days.
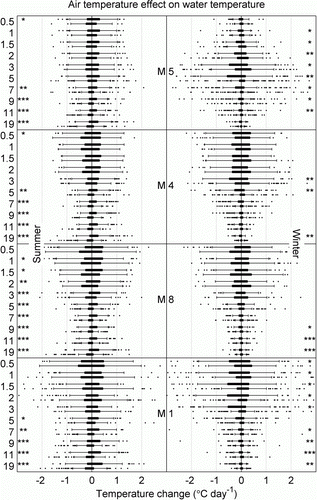
Figure 9 Effect of tailrace discharge on water temperature at M5, M4, M8 and M1. Top boxes are high discharge days, bottom boxes are low discharge days.