Figures & data
Figure 1. Map showing the location of Lachish with other major Middle Bronze Age sites in the southern Levant.
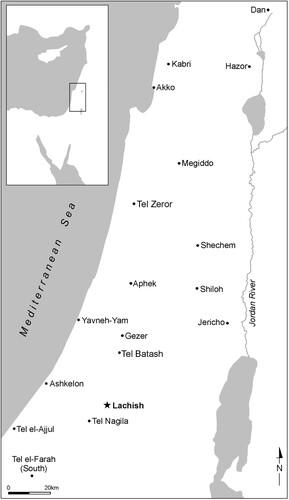
Figure 2. Tel Lachish, the nearby Lachish Stream, and a schematic representation of the ‘Revetment’. The 21 points marked around the site are discussed in the text.
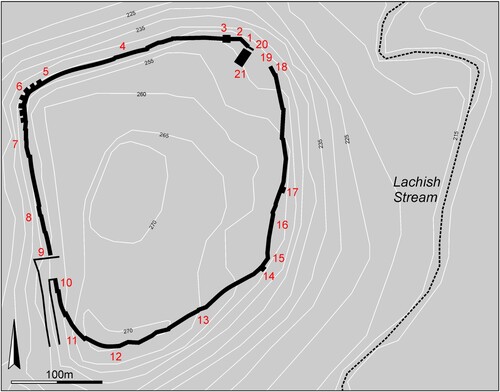
Figure 3. The ‘Revetment’, excavated around the entire site, appears as a dark line on the mid-slope of the tel: the eastern side with part of the southern side on the left and part of the northern side on the right (looking west) (courtesy of the Wellcome Trust archive, London).
Figure 4. The ‘Revetment’, excavated around the entire site, appears as a dark line on the mid-slope of the tel: the northern side on the left and the western side on the right (looking east) (Starkey Citation1933, Pl. I, courtesy of the Wellcome Trust archive, London).
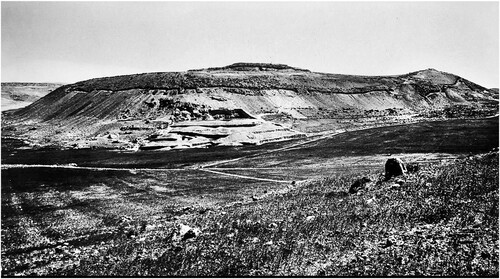
Figure 5. The ‘Revetment’ near the northeast corner of the site as exposed by the First Expedition. Note that the massive wall on the right side of the picture ends in a straight vertical line, indicating its edge (Point 1). To the left there is a poorly built stone wall, that blocked the area further to the south (Point 20). This area had been designated by the First Expedition as a ‘blocking of a gate’ (Tufnell Citation1953, Pl. 11:3) (courtesy of the Wellcome Trust archive, London).
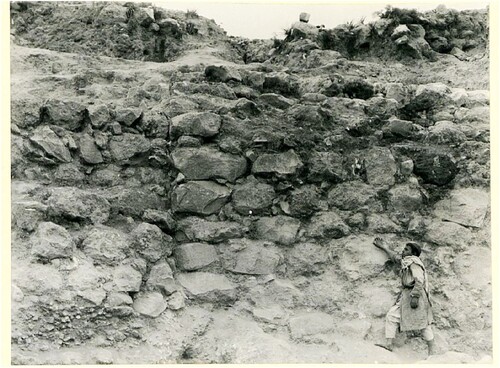
Figure 6. Plan of the northeast corner of Tel Lachish, showing the following points: 1. An end of the ‘Revetment’. 2. The northeast corner of the wall. 3. A tower. 20. A later wall abutting the ‘Revetment’ from the south. 21. A massive three-room mudbrick citadel dated to the Middle Bronze Age IIc.
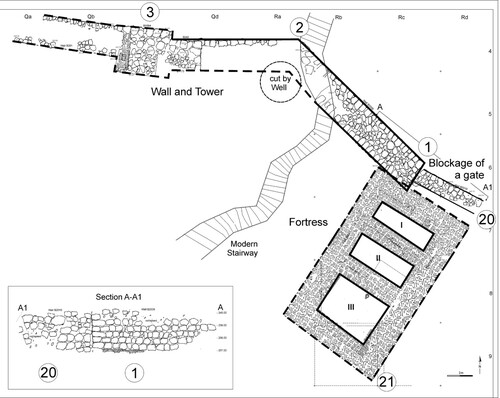
Figure 7. The northeast corner of the ‘Revetment’. Note the elaborate construction using massive, well-cut limestone blocks (courtesy of the Wellcome Trust archive, London).
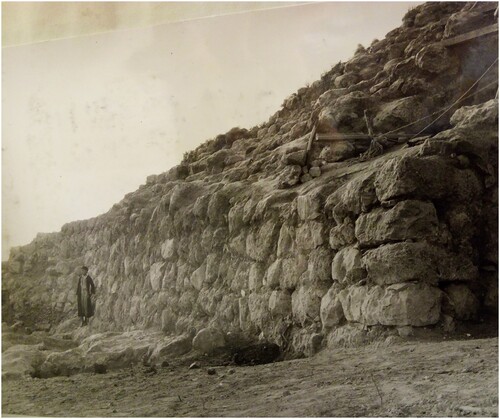
Figure 8. Seven thick buttresses located at the northwest corner of the site, supporting the corner (courtesy of the Wellcome Trust archive, London).
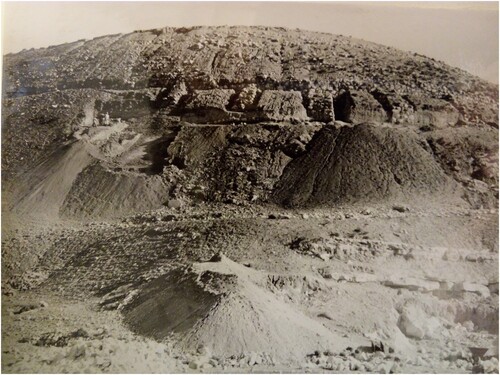
Figure 9. The ‘Revetment’ on the western side of the site. The façade was built with salients and recesses, which imparted additional strength to the construction (for a similar photograph see Tufnell Citation1953, Pl. 12:1, courtesy of the Wellcome Trust archive, London).
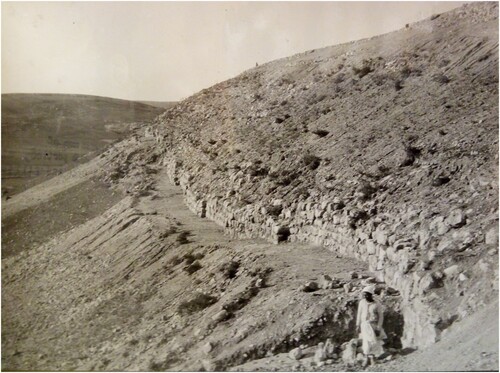
Figure 10. Artistic reconstruction of the Iron Age city of Tel Lachish. The city is presented with two walls encircling it, one at the top of the site and the other (the ‘Revetment’) located further down the slope. The city is shown looking east. Note that the ‘Revetment’ abuts the Iron Age gate. The reconstruction was drawn in the middle of the First Expedition’s first season of fieldwork, when little of the Iron Age city had yet been exposed (Starkey Citation1933, Pl. III, courtesy of the Wellcome Trust archive, London).
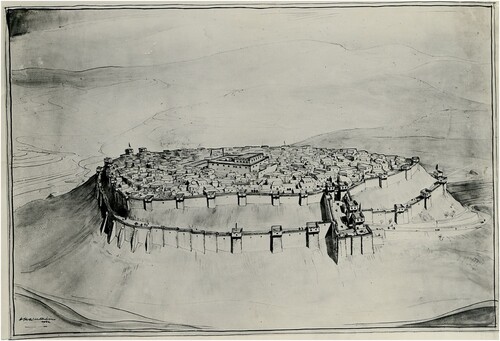
Figure 11. The southeast corner of the ‘Revetment’. (Point 15) (Tufnell Citation1953, Pl. 11:4, courtesy of the Wellcome Trust archive, London).
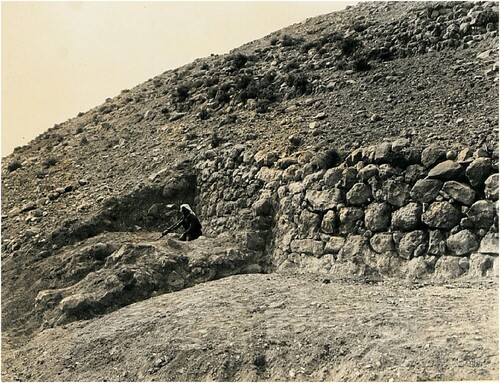
Figure 12. The eastern side of the ‘Revetment’, with a plastered installation abutting it from outside the city (Point 16) (Tufnell Citation1953, Pl. 12:6, courtesy of the Wellcome Trust archive, London).
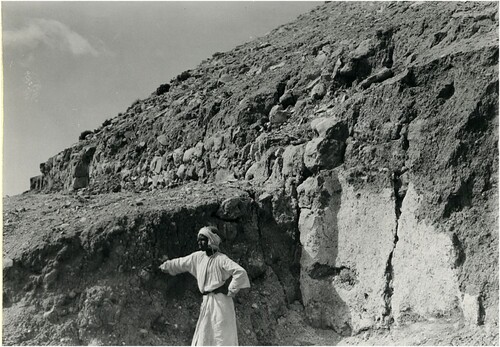
Figure 13. The edge of the ‘Revetment’ on the east side of Tel Lachish (Point 19, the lower part). Note that the massive wall was built on bedrock and still standing to a height of 13 courses (courtesy of the Wellcome Trust archive, London).
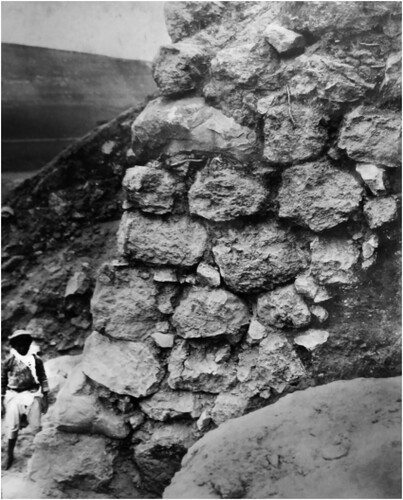
Figure 14. The edge of the ‘Revetment’ on the east side of Tel Lachish (Point 19, the upper part). The wall does not stand upright but is tilted toward the city, like a terrace wall (Tufnell Citation1953, Pl. 11:5, courtesy of the Wellcome Trust archive, London).
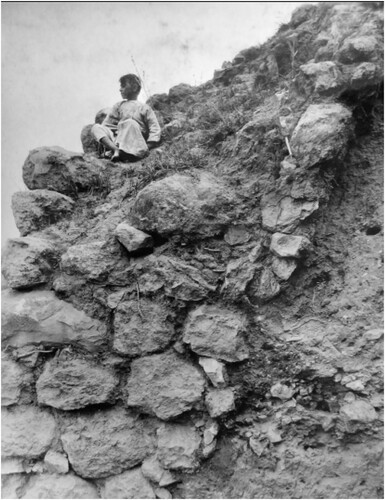
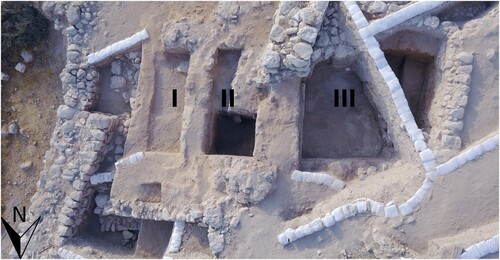
Figure 15. Aerial photograph showing the end of the ‘Revetment’ (Point 1), the later wall (Point 20), and the massive mudbrick citadel with its three rooms (Point 21).