
Figures & data
Fig. 1. Plan of Beverley Minster, with that of Romanesque Southwell Minster superimposed S. Harrison
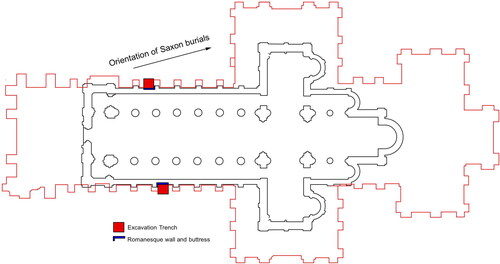
Fig. 2. Plan of Beverley Minster by J. Bilson in Architectural Review, 3 (1894–98), adapted with revised dating by the authors
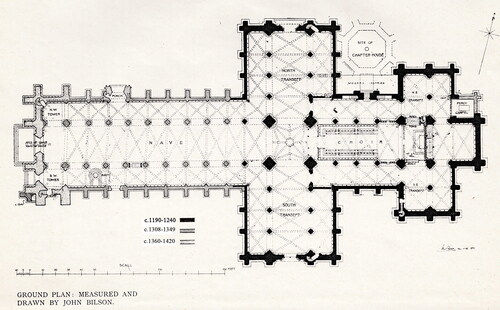
Fig. 3. Beverley Minster: main bay elevation in the presbytery, showing the tall proportions in relation to the bay width
S. Harrison
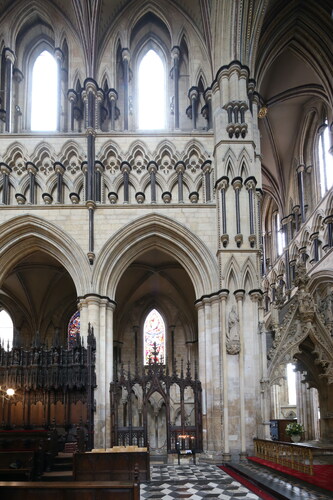
Fig. 4. Beverley Minster: the north spandrel of the western arch of the eastern crossing, showing the quatrefoil decoration and blind arch with Purbeck marble shafts. The string-course in the corner above is also of Purbeck. Note the open putlog hole and wide fissure in the masonry
J. Phillips
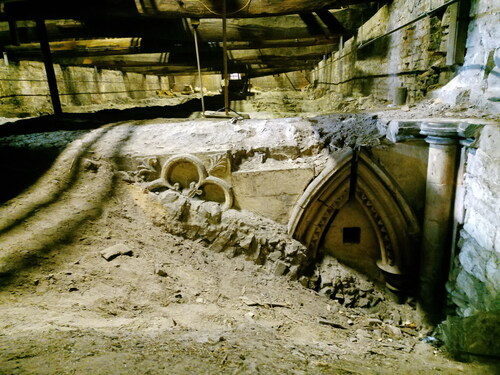
Fig. 5. Beverley Minster: the north-west crossing pier and eastern crossing seen from the south-east transept
S. Harrison
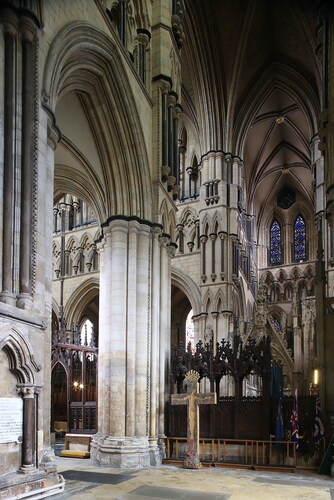
Fig. 6. a–d showing various masons’ marks
J. Phillips
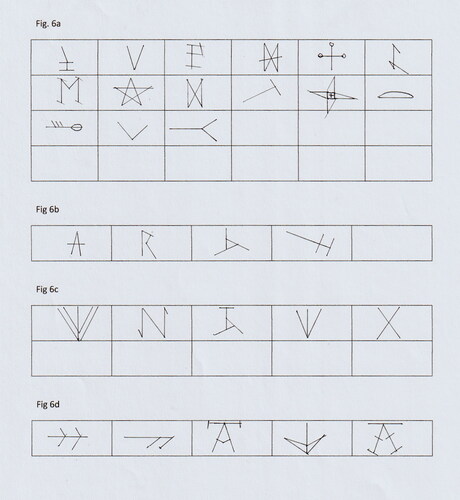
Fig. 7. Beverley Minster: plan showing the three phases of building and dendrochronological dating in the nave roof
S. Harrison
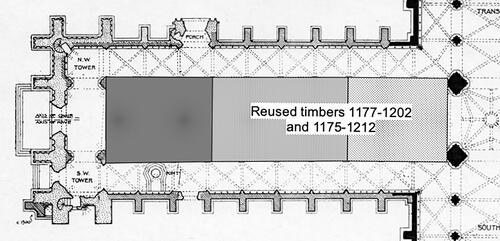
Table 1. Dendrochronological felling dates in chronological order
Fig. 8. Beverley Minster: reconstruction drawing showing the type of roof trusses from the choir, east transept and west transept
S. Harrison
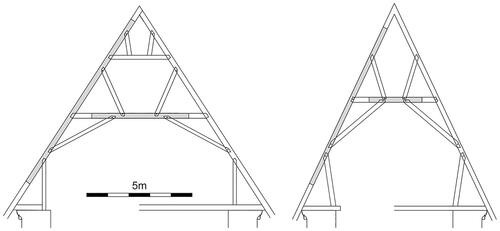
Fig. 9. J. Bilson’s plan of Beverley Minster, with the felling dates of the timbers in various parts of the roofs superimposed
S. Harrison
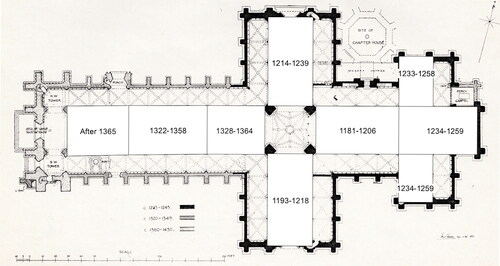
Fig. 10. Reconstructed trusses from reused timbers in the nave roof, with group felling dates 1177–1202 and 1175–1212
S. Harrison
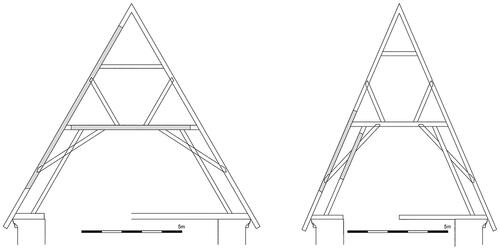
Fig. 11. 3D models of the arcade piers (from left to right) at Byland, Jervaulx, Beverley, Fountains and Meaux
S. Harrison
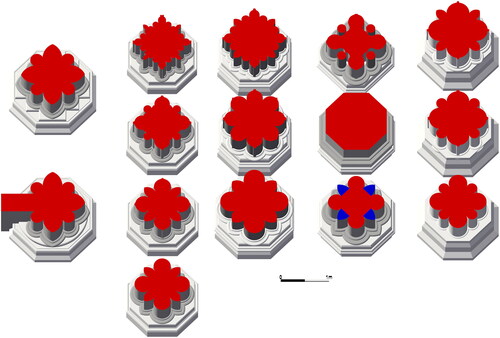
Fig. 12. Profiles of the main arcade mouldings at Jervaulx, Beverley and Fountains shown as J, B and F
S. Harrison
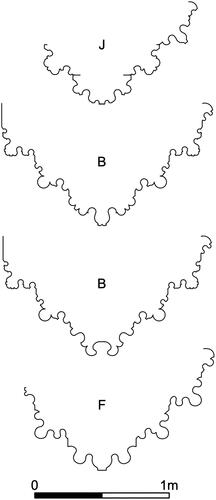
Fig. 13. Byland Abbey: half-pier capital, showing individual bell-rim segments under square imposts
S. Harrison

Fig. 14. Byland Abbey: north nave aisle respond capital showing single circular rim over three shafts
S. Harrison
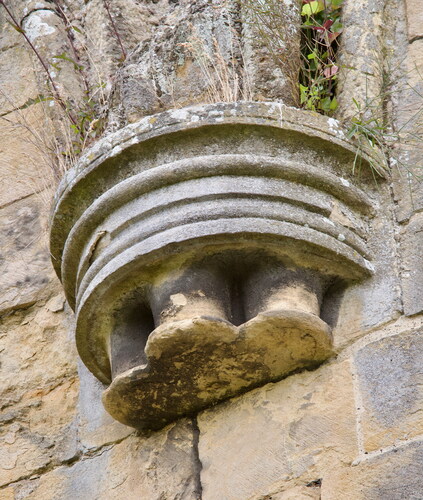
Fig. 15. Byland Abbey: south nave aisle respond capital showing circular imposts and abaci
S. Harrison

Fig. 16. Jervaulx Abbey: large moulded capital from the main pier
S. Harrison
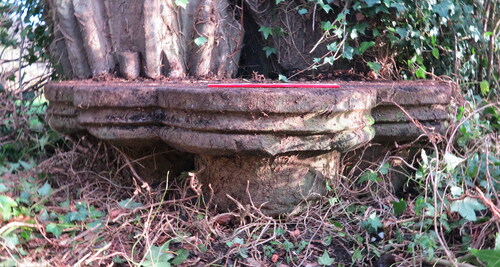
Fig. 17. Jervaulx Abbey: a moulded polygonal corbel from the rear wall of the clerestory
S. Harrison
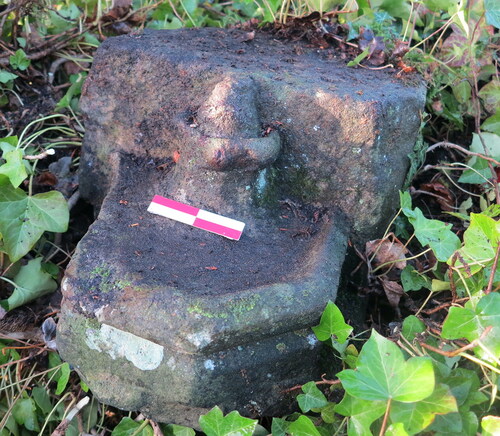
Fig. 18. Jervaulx Abbey: a double polygonal corbel from the cross-passage lintel set on the clerestory bay division
S. Harrison
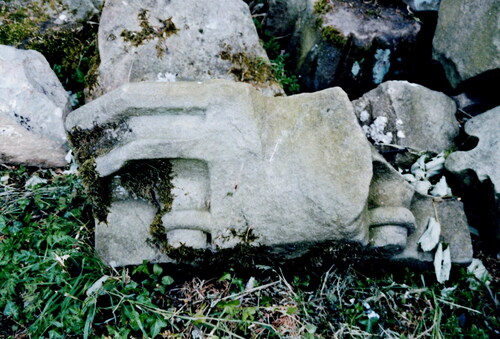
Fig. 19. Jervaulx Abbey: moulded polygonal capital from the front screen wall arcade of the clerestory
S. Harrison

Fig. 20. Vault rib and other profiles from Jervaulx (J), Beverley (B), Fountains (F), Meaux (M), Bridlington (BN) and Guisborough (G). J1–2, diagonal ribs; J3–5, transverse ribs; F6, diagonal and transverse aisle vault ribs; F9, high vault transverse and diagonal ribs; F10, single transverse high vault rib; B7, aisle diagonal and transverse rib; M8, aisle vault rib; J11, B12, F13, BN14, G15, clerestory front arcade mouldings
S. Harrison
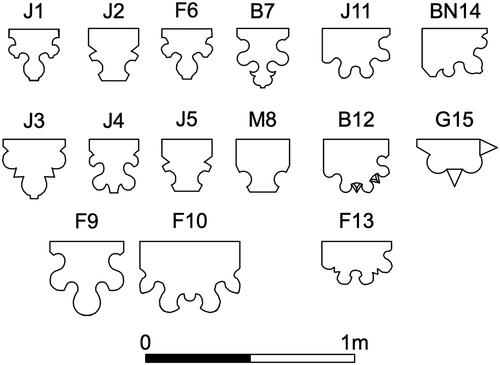
Fig. 21. Jervaulx Abbey: main clerestory double capital set on the bay division. This shows that no bay dividing shaft was provided. Note the capital is upside down
S. Harrison
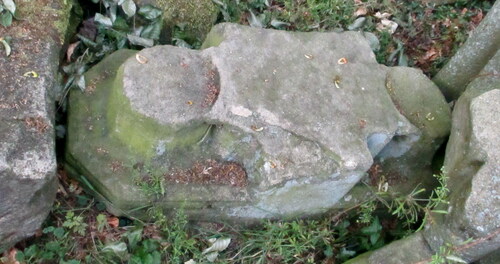
Fig. 22. Jervaulx Abbey: top of a single polygonal clerestory capital, showing the sockets and channels for iron reinforcing bars set at right angles to each other
S. Harrison
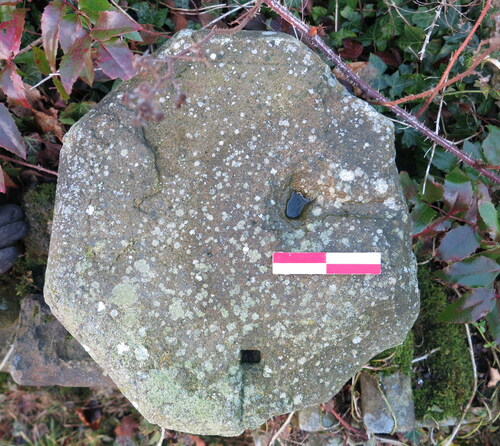
Fig. 23. 3D reconstruction of Jervaulx Abbey, showing the three possible clerestory designs
S. Harrison
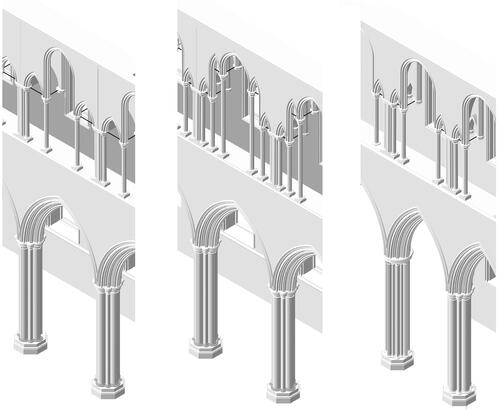
Fig. 24. Fountains Abbey: the north presbytery aisle, showing the ‘hook’ shape of the arches flanking the lancet windows
S. Harrison
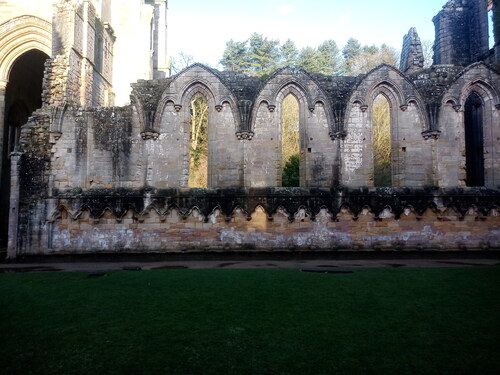
Fig. 25. Beverley Minster: north transept, west aisle
S. Harrison
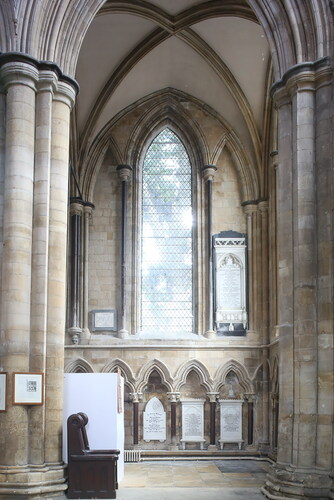
Fig. 26. Fountains Abbey: one bay of the clerestory in the Chapel of the Nine Altars, showing the system of rear wall corbels and chamfered blind arches. At left of centre is the cut back high vault springer with tas-de-charge level-bedded blocks
S. Harrison
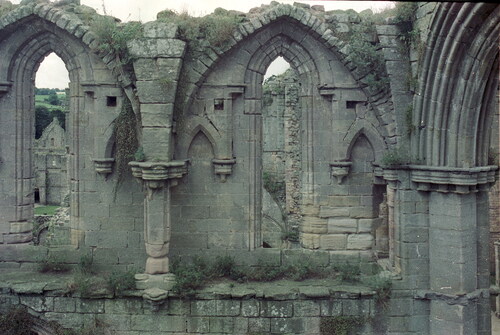
Fig. 27. 3D reconstruction of the bay elevation of the presbytery at Fountains Abbey presbytery. The vault cells have been omitted for clarity
S. Harrison
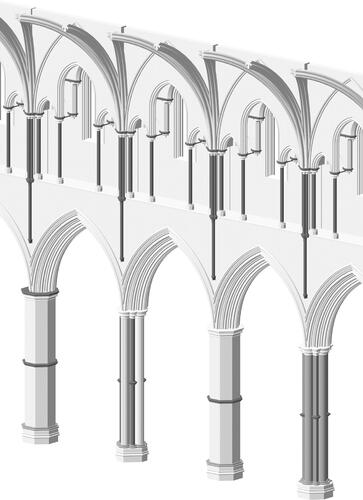
Fig. 28. Guisborough Priory: mouldings of the surviving stones from the clerestory, showing the close similarities with Jervaulx, Beverley and Fountains. Left: front screen arcade arch. Right: clerestory window
S. Harrison
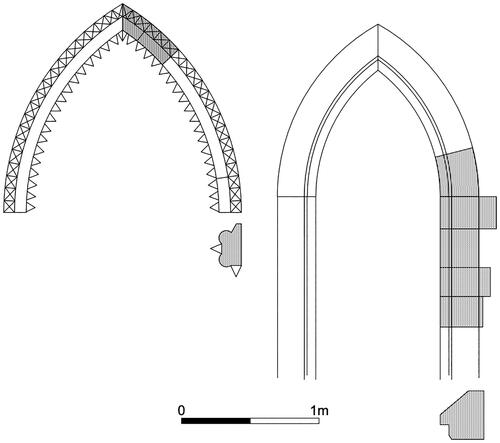
Fig. 29. Reconstruction of a syncopated wall arcade from Guisborough Priory, with waterleaf capitals
S. Harrison
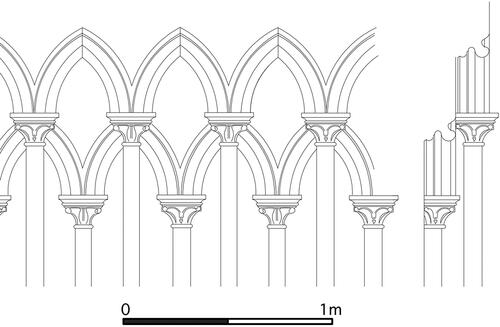
Fig. 30. Guisborough Priory: waterleaf capital and keystone from a syncopated arcade
J. Phillips
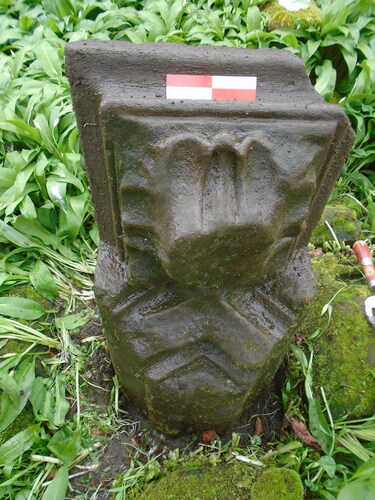
Fig. 31. Carlisle Cathedral: the north aisle wall, showing ‘hook’ arches like those at Fountains Abbey, shown in
S. Harrison
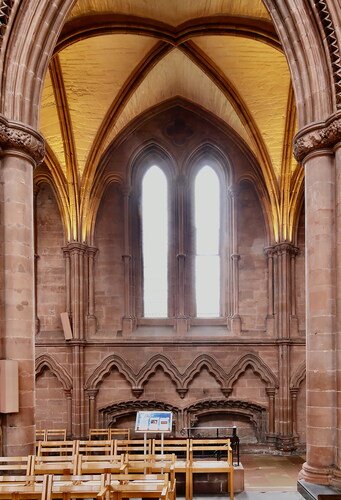
Fig. 32. Meaux Abbey: mouldings and arches, showing similarities with Jervaulx, Beverley and Fountains
S. Harrison
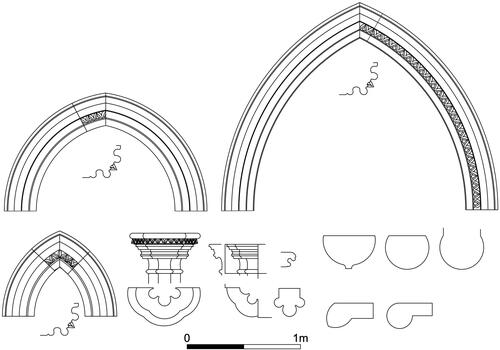
Fig. 33. Meaux Abbey Farm: corner capital, similar to those at Jervaulx, Beverley and Fountains
S. Harrison
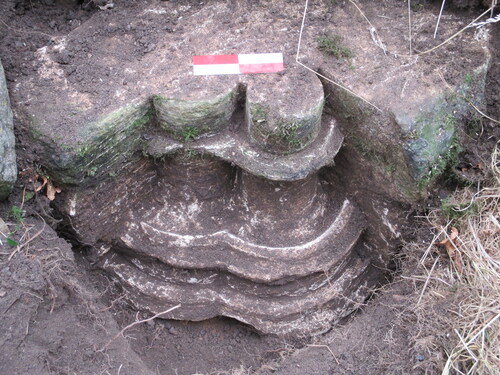
Fig. 34. Reconstructed nave arcade at Revesby Abbey (Lincs.), based on excavated evidence for octagonal pier bases, pier fragments, capitals and arch soffit mouldings
S. Harrison
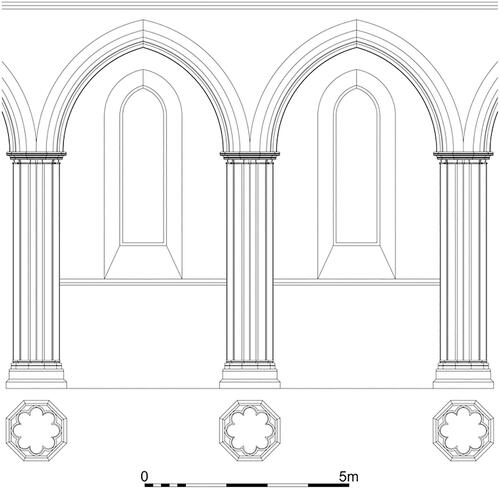
Fig. 35. Bridlington Priory: north nave arcade, showing similar piers and mouldings to Beverley Minster
S. Harrison
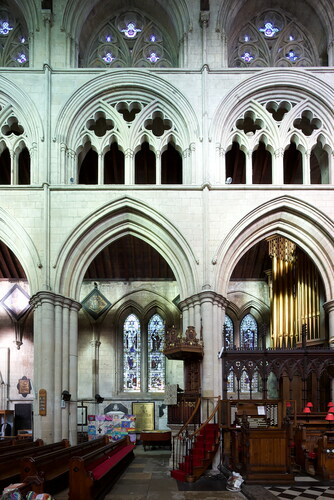
Fig. 36. Bridlington Priory: reconstruction of a clerestory screen arcade like those at Jervaulx, Beverley and Fountains, based on a loose springer and a voussoir in the north nave aisle
S. Harrison
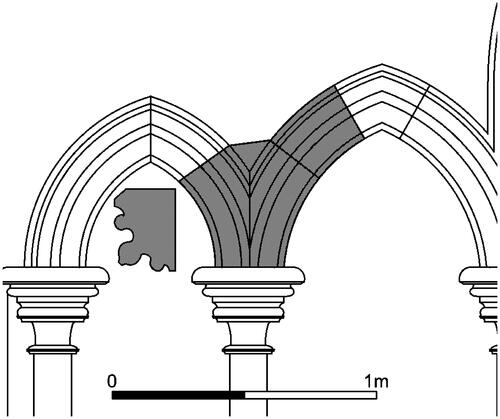
Fig. 37. Kirkham Priory: east front, showing capitals on the corners of the buttresses and the partial outline of circular window at top right to light the north presbytery aisle
J. Phillips
