Figures & data
Figure 1. Distribution map of Class A1 strap-ends.

Figure 2. Examples of Class F strap-ends and buckle plates: LANCUM-2AD712 (left); top row, left to right: NMS-627136, YORYM-077738, LANCUM-8AE737; bottom centre: SUSS-742D82; buckle plates: Aldwark sf 925 (top), YORYM-55A828 (bottom) (Images courtesy of PAS and York Archaeological Trust).
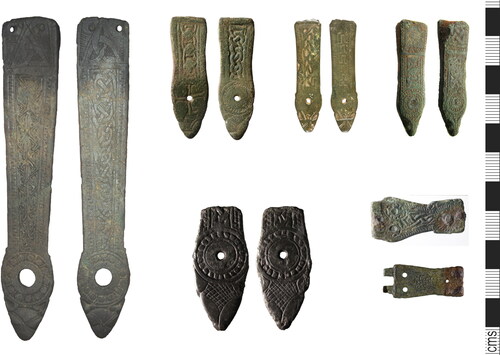
Figure 3. Distribution map of Class F strap-ends and buckle plates.

Figure 4. Examples of B5-1, B5-2 and B5-3 strap ends. Left to right — B5.1: Aggersborg; top row: YORYM-04F067; NCL-190500; YORYM-635EE3; bottom row: YORYM-4F55E0; LIN-DDEA45; YORYM-0219E8; B5-2: YORYM-482EE5; B5-3: YORYM-B001D5.
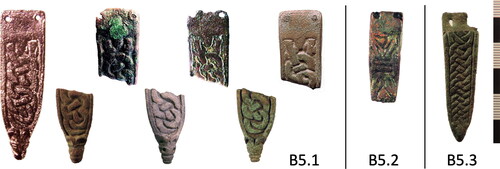
Figure 5. Distribution map of B5 strap-ends.

Figure 6. Examples of A1avii ‘Wooperton’ strap-ends (left to right): YORYM-02377C; YORYM-AB5949; YORYM-B1D77B; YORYM-D23B76; YORYM-C82494; NLM-5A69C5.
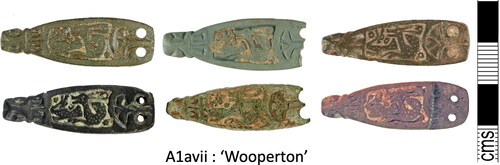
Figure 7. Distribution map of A1avii ‘Wooperton’ strap-ends.

Figure 8. The five main types of plate-headed pins: (1) discoidal (DUR-9B661C); (2) lozenge (FAKL-AE35B4); (3) small pentagonal (LANCUM-B47C34); (4) rectangular (LIN-9033A8); (5) large discoidal (YORYM-546D89).
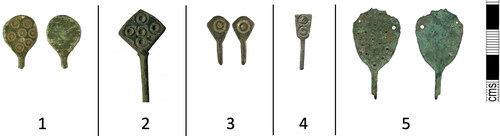
Figure 9. Distribution map of plate-headed pins.
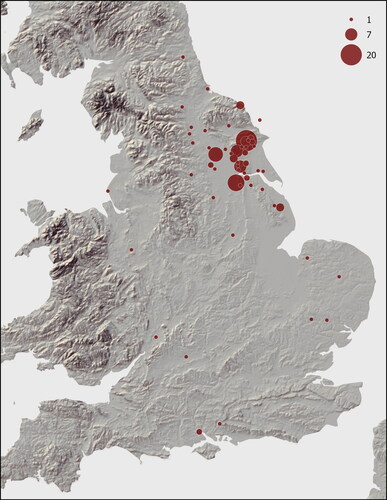
Figure 10. Examples of B4a (Cottam ‘B’, YORYM-174D97); E3 (LVPL-537933, YORYM-D98B74); and E4 strap-ends (LANCUM-BAC646, NMS-393CA2).
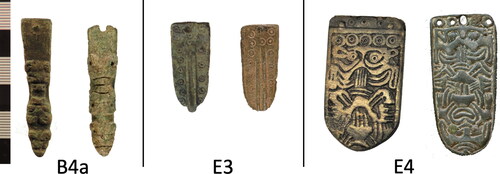
Figure 11. Distribution map of B4a, E3 and E4 later strap-end types.
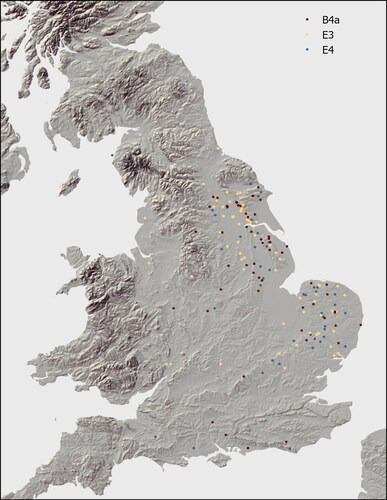
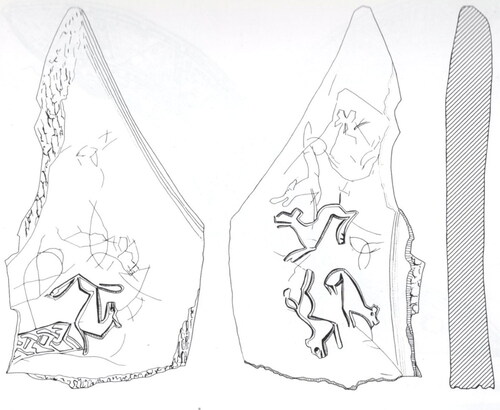
Figure 12. Hand wrought strap-end from Cottam ‘B’ (YORYM-9D8DA2), showing multiple tapping of the chisel, evident in the broken lines delineating the animal, increasing the likelihood that the inlay would key firmly into the design.
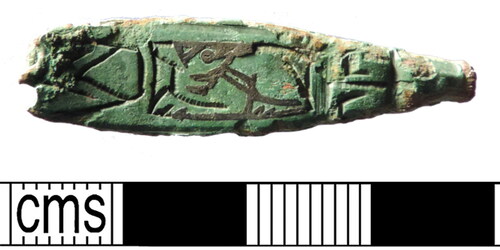
Figure 13. Bone motif piece (sf6982) from Coppergate, York (courtesy York Archaeological Trust).