Figures & data
Table 1. Participant characteristics mean ± SD.
Figure 1. Conceptual model of identified technique aspects and coaching practices that lead to successful inswing and outswing performance.
Table 2. Themes, sub-themes, codes, and participant quotes.
Figure 2. Schematics of bowling action classification at back foot contact of delivery stride as viewed from above (images below) and bowling arm path as viewed from behind (images above) for a right-handed bowler. (a) Front-on bowling action leading to bowling arm inside perpendicular and (b) side-on bowling action leading to bowling arm outside perpendicular.
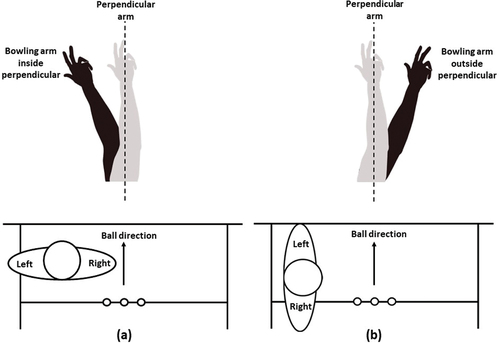
Figure 3. (a) straight seam grip with the primary seam between the index and middle fingers and (b) angled seam grip with the primary seam angled across the index and middle fingers.
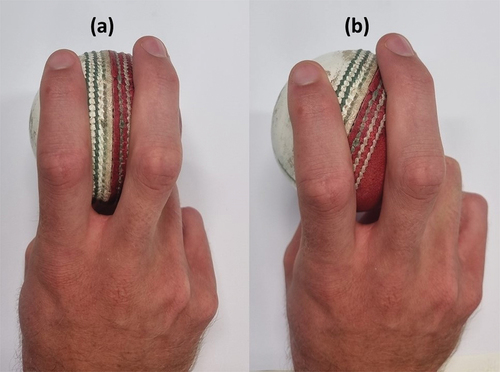
Figure 4. (a) Angled and upright seam and (b) angled and non-upright seam as viewed from behind (left images) and above (right images).
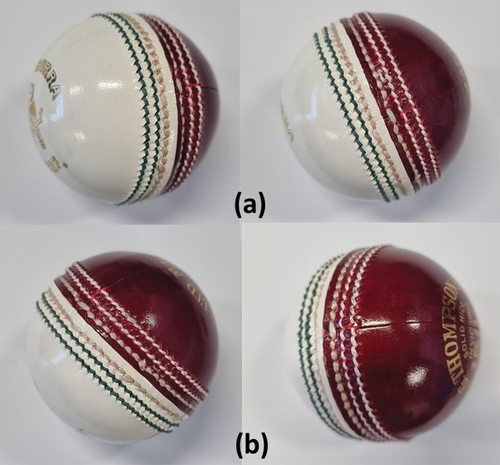
Figure 5. Overhead schematic of different release points of swinging deliveries. The solid line represents a delivery with a release point close to the stumps. This delivery is initially projected towards the stumps but swings and pitches outside the line of the stumps. The dashed line represents a wider release point where the delivery is also projected towards the stumps but pitches in line with the stumps.