
Figures & data
Figure 1. (a) Tear Drop Thermistors: (1) Yellow (left); (2) Blue (Strip Bottom); (3) Yellow/Black (Posterior); (4) Red (Base); (5) White (Right); (6) Transparent (Anterior); (7) Blue/Black (Strip Top); (8) Green (Dome). Strip: 1 cm apart on Kapton Flexible Strip. (b) Surface Mount Thermistor Strip.
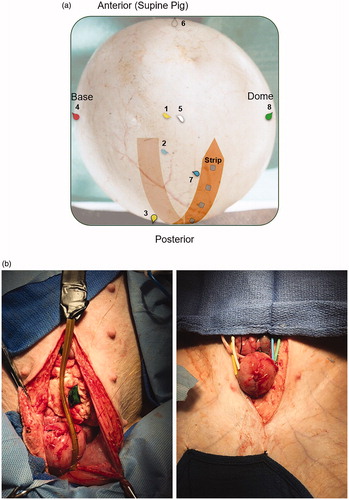
Figure 2. Combat BRS Temperature profile.
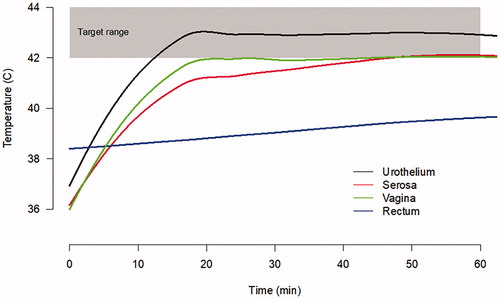
Figure 3. Median mitomycin C concentration in various organs and bodily fluid.
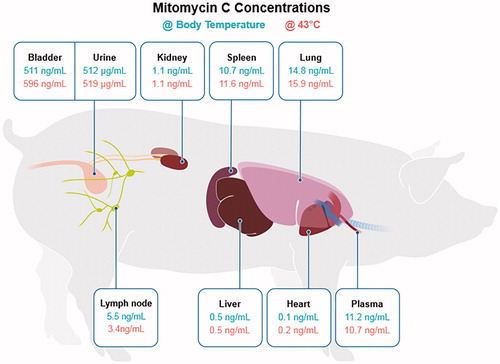
Figure 4. Jitter plot evaluation mitomycin C concentration in various organs at necropsy sorted by body temperature and 43 °C using the Combat BRS bladder hyperthermia device. (Each dot represents a sample of different dwell times and dosages).
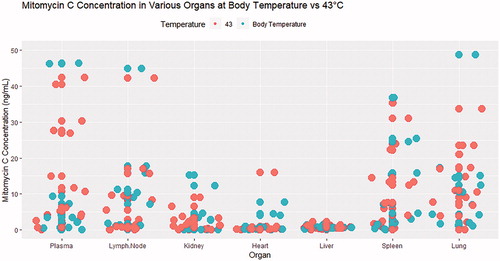
Table 1. Mitomycin C concentration in bladder wall based on dwell time, dose and hyperthermia.