Figures & data
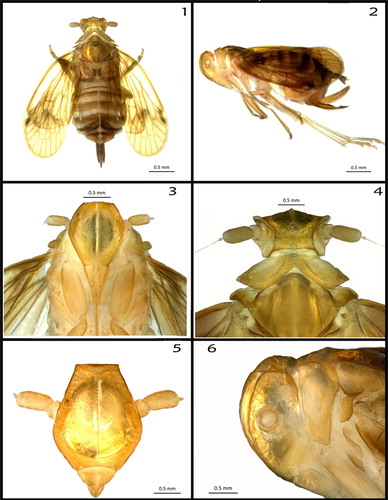
Figures 1–6. (1) Adult female, dorsal view; (2) adult female, left lateral view; (3) frons and clypeus, ventral view; (4) head, pronotum and mesonotum, dorsal view; (5) frons and antennae (scape, pedicel, arista missing), frontal view; (6) head and prothorax, left lateral view.
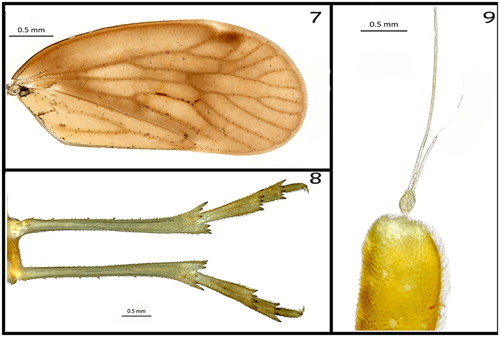
Figures 7–9. (7) Right tegmen (female); (8) hindlegs, ventral view; (9) second antennal segment (scape) and flagellum/arista.
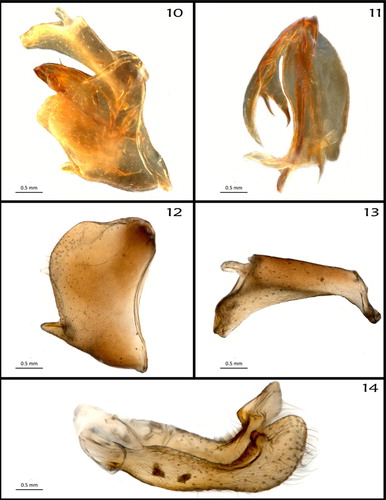
Figures 10–14. Male genitalia. (10) Genital capsule, in situ, right lateral view; (11) aedeagus, left lateral view; (12) genital segment (pygofer), right lateral view; (13) anal segment, right lateral view; (14) genital styles, left lateral view.
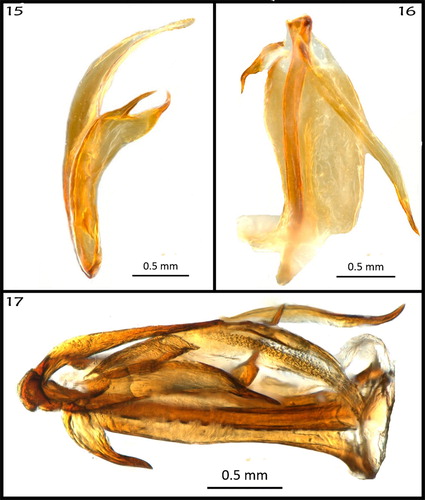
Figures 15–17. Aedeagus. (15) Flagellum (distal portion of aedeagus), separated from phallobase, right lateral view; (16) phallobase (flagellum removed), left lateral view; (17) aedeagus, undissected, dorsal view.
Figures 18–20. (18) Right tegmen of the carcass of male 1 (note veins SCR1, SCR2 and SCR3); (19) same, of the carcass of male 2 (note veins SCR1 and SCR2); (20); same, of the carcass of male 3 (note R1 and R2).
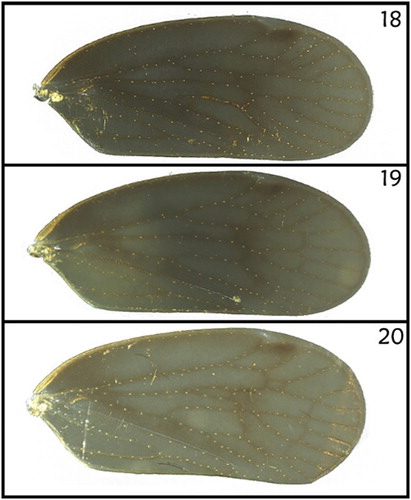
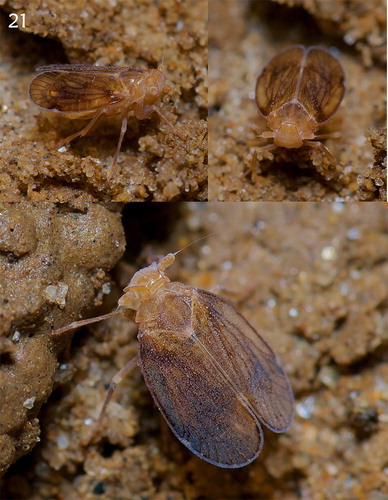
Figure 21. Confuga persephone, adult female, in its habitat.
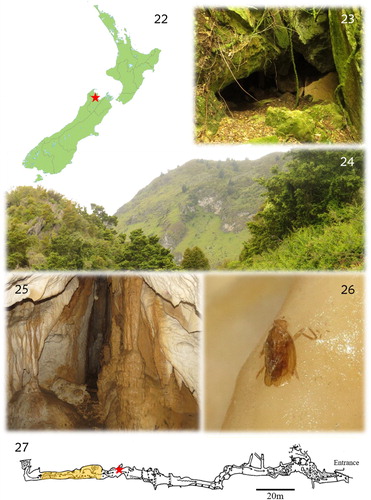
Figures 22–27. (22) Location of Council Cave on the South Island of New Zealand; (23) Council Cave entrance; (24) general aspect of the karst area around Council Cave; (25) cave interior, showing speleothems on which adult specimens of C. persephone can be found; (26) carcass of a male found on a speleothem; (27) Council Cave map; the yellow area represents the sites where specimens are more commonly found; the red star marks the site where the female described in this study was found.