Figures & data
FIGURE 1 Block diagram of induction motor in situ efficiency determination.
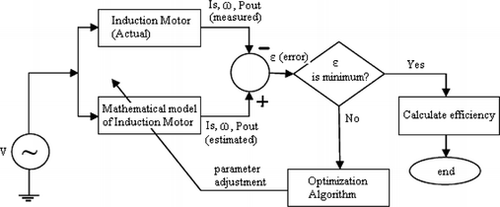
FIGURE 2 Winding arrangement of star connected motor.
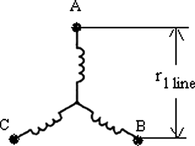
TABLE 1 Measured Data of the Test Motor
FIGURE 3 Equivalent circuit of induction motor with stray loss resistance.
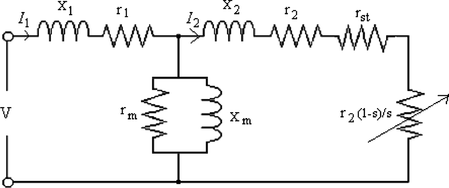
FIGURE 4 Equivalent circuit of induction motor (modified).
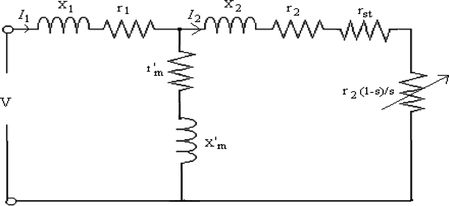
TABLE 2 Stray Load Losses for the Different Capacity Motors
FIGURE 5 Performance curves of algorithms using objective function ff 1 of Figure 3.
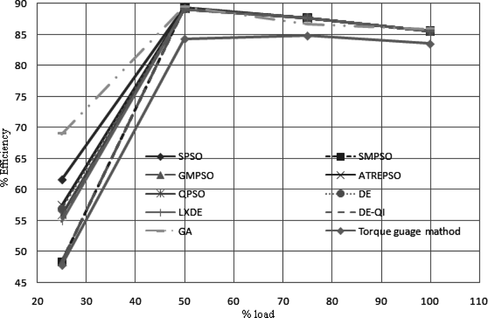
FIGURE 6 Performance curves of algorithms using objective function ff 2 of Figure 3.
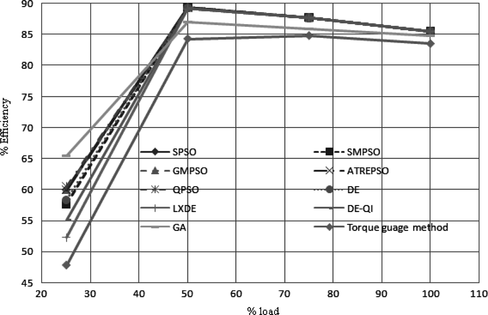
FIGURE 7 Performance curves of algorithms using objective function ff 3 of Figure 3.
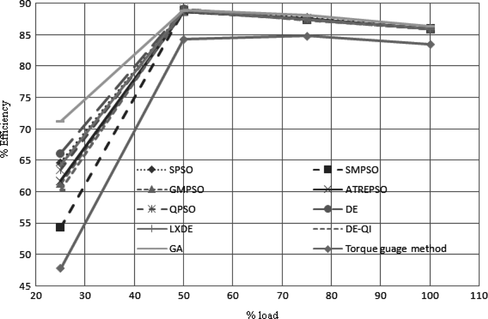
FIGURE 8 Performance curves of algorithms using objective function ff 1 of Figure 4.

FIGURE 9 Performance curves of algorithms using objective function ff 2 of Figure 4.

FIGURE 10 Performance curves of algorithms using objective function ff 3 of Figure 4.
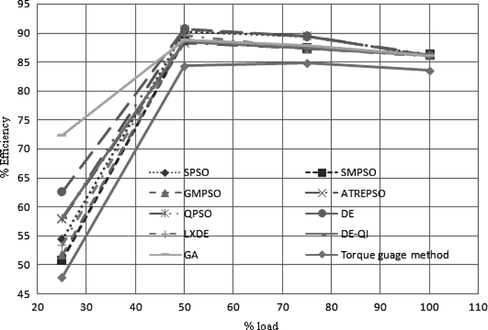
FIGURE 11 Performance curves of algorithms using objective function ff 4 of Figure 4.
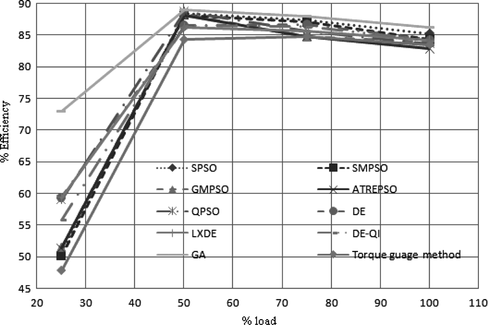
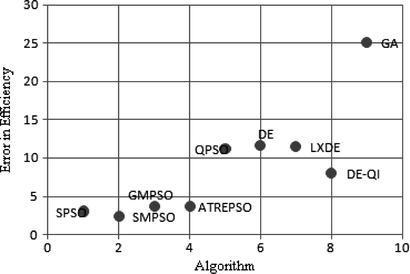
FIGURE 12 Comparison of algorithms for objective function ff 1 at 25% load corresponding to Figure 4.
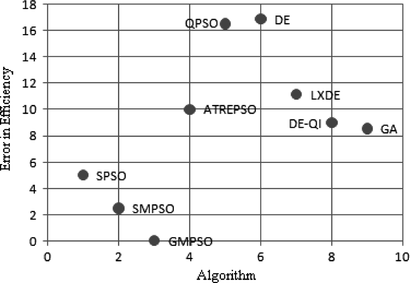
FIGURE 13 Comparison of algorithms for objective function ff 2 at 25% load corresponding to Figure 4.
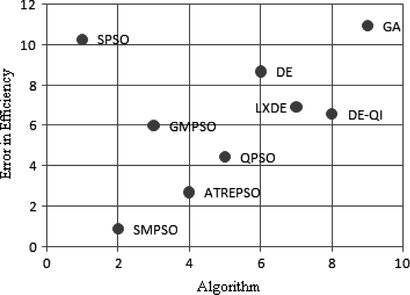
FIGURE 14 Comparison of algorithms for objective function ff 3 at 25% load corresponding to Figure 4.
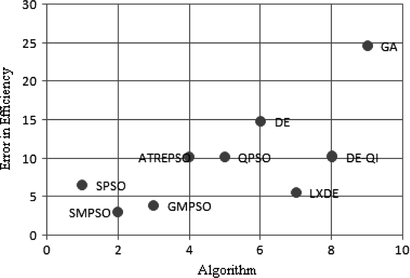
FIGURE 15 Comparison of algorithms for objective function ff 4 at 25% load corresponding to Figure 4.