Figures & data
Figure 1. Experimental vehicle and simulator.
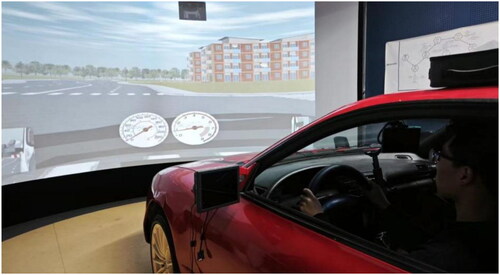
Figure 2. The driving scenarios, i.e., full marking condition (top) and key marking (bottom) condition.
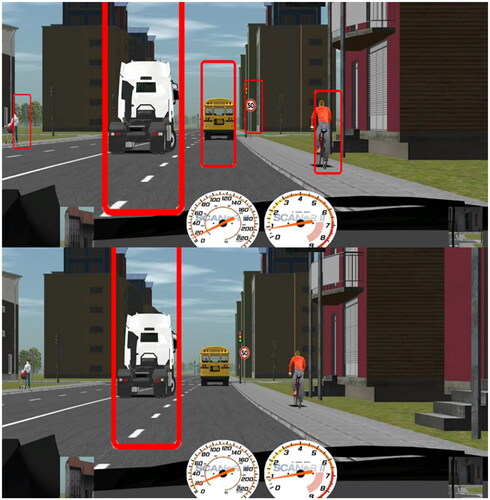
Figure 3. The takeover and experimental procedures.
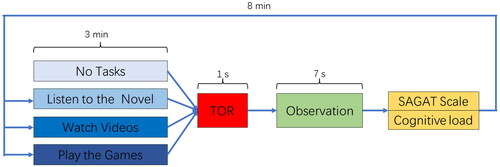
Figure 4. The SAGAT score, i.e., comparing visual assistance within a fixed task type (top) and comparing task types within a fixed visual assistance (bottom).
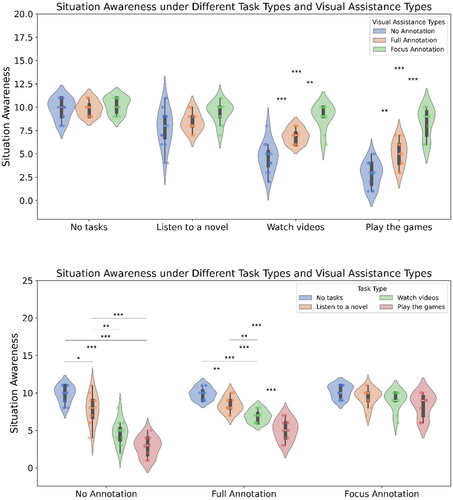
Figure 5. The cognitive load score, i.e., comparing visual assistance within a fixed task type (top) and comparing task types within a fixed visual assistance (bottom).
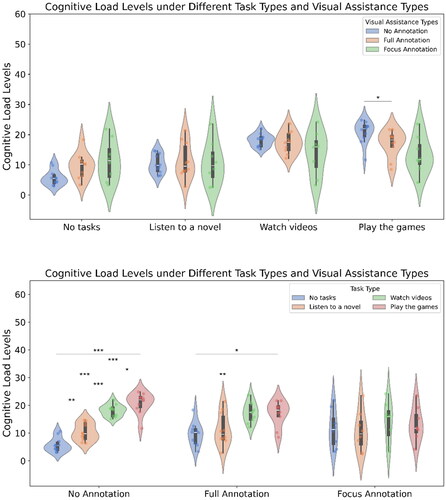
Figure 6. The AOI fixation duration, i.e., comparing visual assistance within a fixed task type (top) and comparing task types within a fixed visual assistance (bottom).
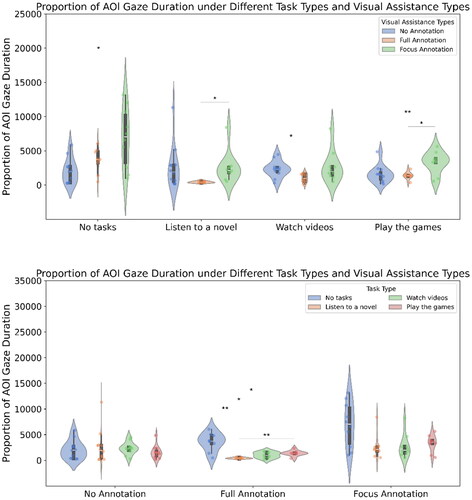
Figure 7. The first fixation time, i.e., comparing visual assistance within a fixed task type (top) and comparing task types within a fixed visual assistance (bottom).
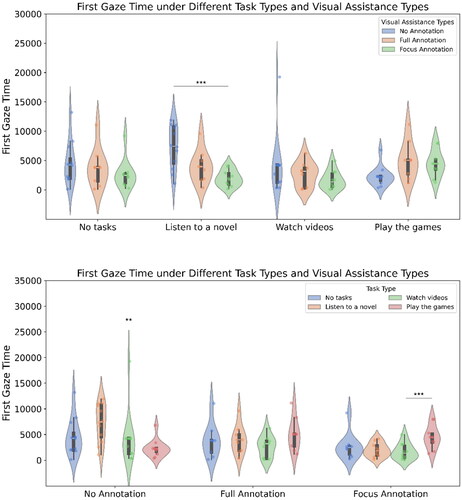
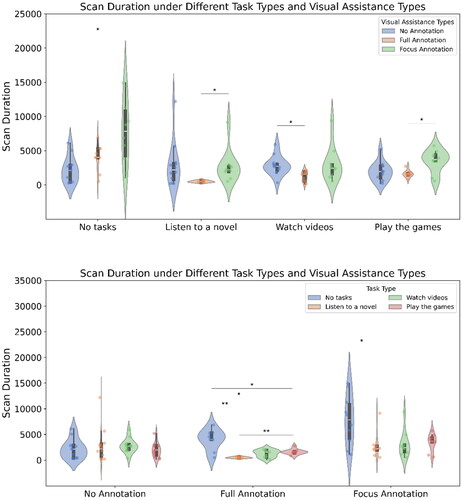
Figure 8. The saccade duration, i.e., comparing visual assistance within a fixed task type (top) and comparing task types within a fixed visual assistance (bottom).