Figures & data
Fig. 1 Structure of the seat rig, showing the seat back reinforcement and spring–damper system (OEM [original equipment manufacturer] seat cushion and seat back not shown) (color figure available online).
![Fig. 1 Structure of the seat rig, showing the seat back reinforcement and spring–damper system (OEM [original equipment manufacturer] seat cushion and seat back not shown) (color figure available online).](/cms/asset/50c5bc0f-2365-42ff-b36e-2676b72ff1ee/gcpi_a_806987_o_f0001g.jpg)
Fig. 2 Draft GTR-7 Phase 2 Annex 9 sled acceleration corridor.
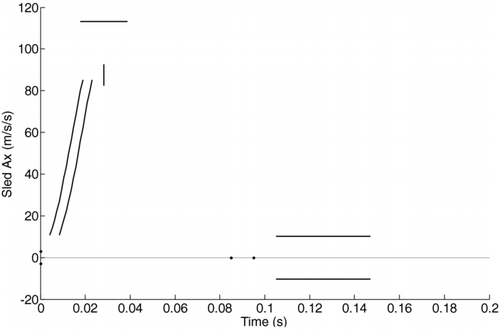
Table 1 Test matrix
Fig. 3 Key for curves from baseline tests (– and ) (color figure available online).
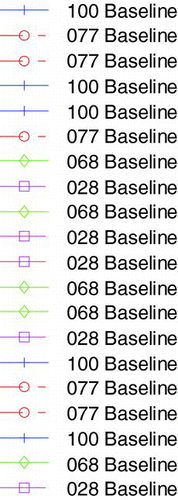
Table 2 Key to the line styles used in the graphs
Table 3 Key to the line colors used in the graphs
Table 4 Sign convention for all BioRID II dummy measurements
Fig. 4 Bundesanstalt für Straßenwesen (Bergisch Gladbach, Germany) sled pulse (20 tests) in the baseline tests (color figure available online).
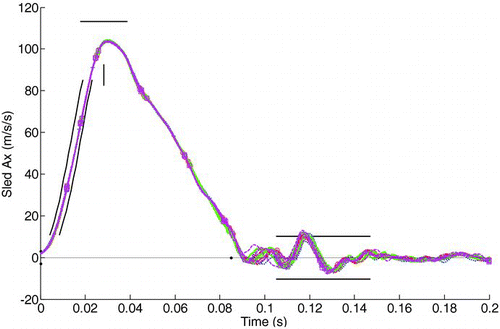
Fig. 5 Seat back angle response (20 tests) in the baseline tests (CV 1.4%) (color figure available online).
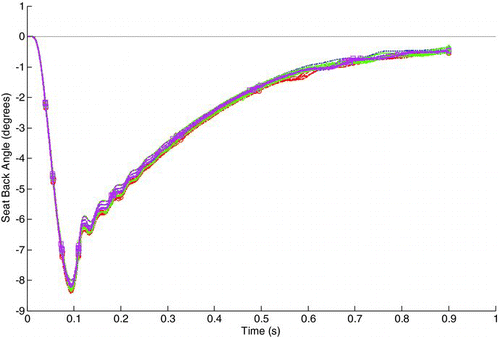
Fig. 6 Distribution of left and right H-points in the X–Z plane in the baseline tests (fixed seat point SRR also shown for comparison) (color figure available online).
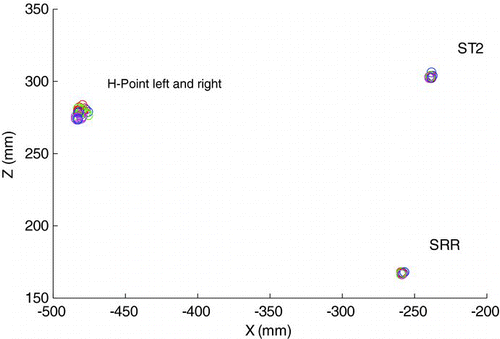
Fig. 7 Upper neck shear force Fx in the baseline tests (CV 10.0%) (color figure available online).
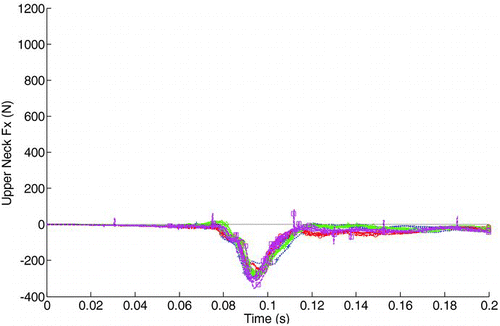
Fig. 8 T1 moment about the Y-axis in the baseline tests (CV 14.4%) (color figure available online).
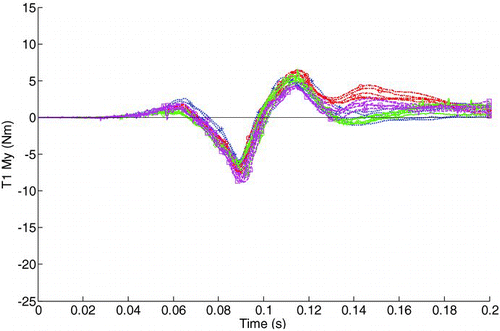
Fig. 9 Upper neck moment about the Y-axis in the baseline tests (n.b.: the green curve that runs off the top of the graph was due to a loose connector; CV 30.3%) (color figure available online).
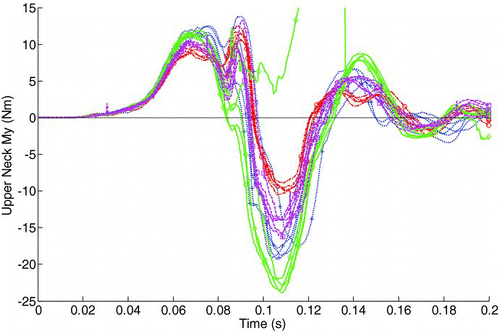
Fig. 10 Upper neck moment about the Y-axis for dummies 068 and 077 with swapped pelvis parts compared to baseline tests (color figure available online).
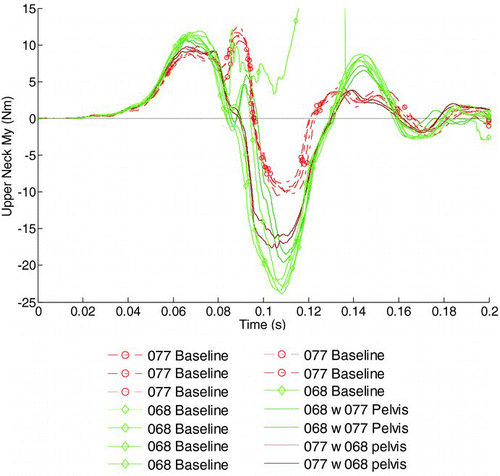
Fig. 11 Upper neck moment about the Y-axis for refurbished dummies 006 and 007 compared to baseline tests with dummies 068 and 077 (color figure available online).
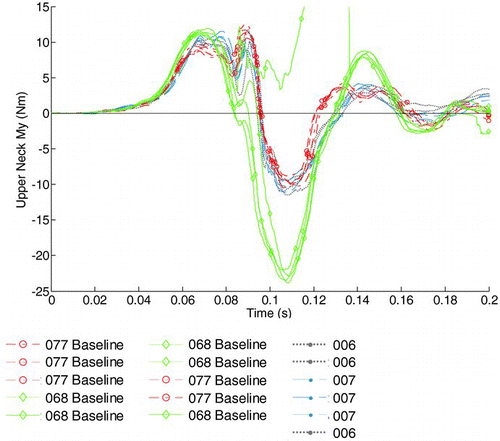
Fig. 12 Pelvis Z-axis acceleration in the baseline tests (CV 28.1%) (color figure available online).
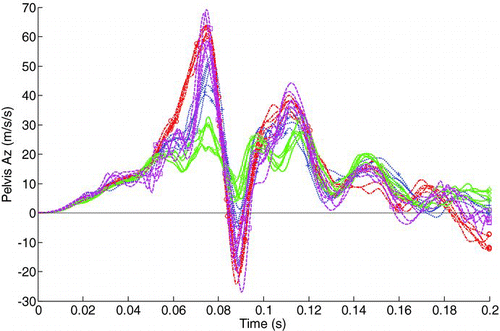
Fig. 13 Head angle relative to T1 (positive is flexion) (color figure available online).
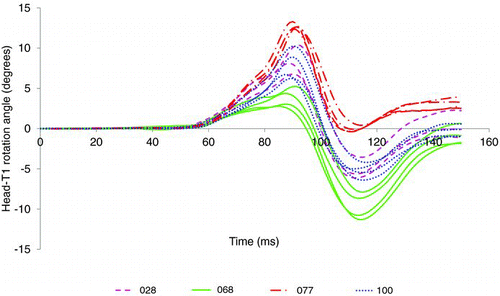
Fig. 14 OC (occipital condyle) Z-axis displacement (CV 11.8%) (color figure available online).
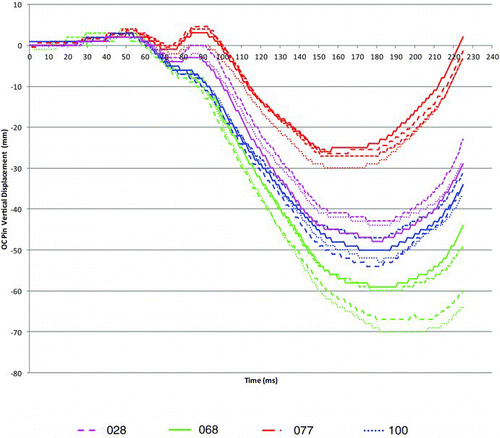
Fig. 15 OC displacement relative to T1 in a seat-back coordinate system (color figure available online).
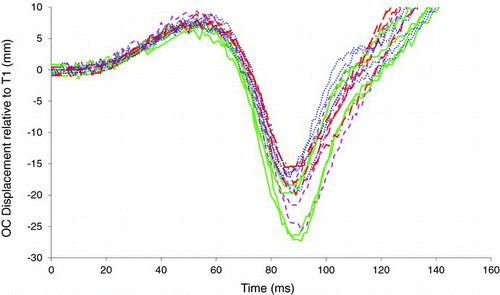
Fig. 16 Upper neck moment about the Y-axis for dummies 068 and 077 with swapped spine parts compared to baseline tests (color figure available online).
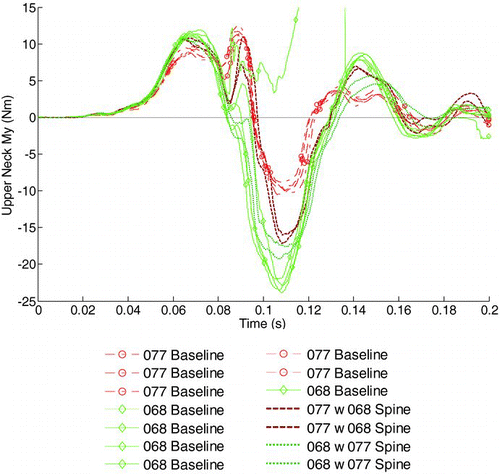
Fig. 17 Upper neck moment about the Y-axis for dummy 077 with standard thickness T2 and T3 rear bumpers compared to baseline tests with dummies 068 and 077 (color figure available online).
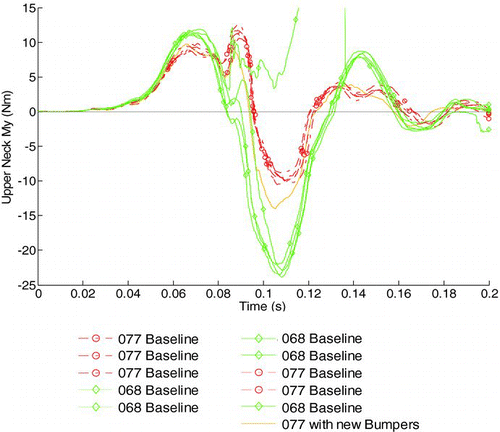
Fig. 18 Upper neck moment about the Y-axis (detail) for dummies 068 and 077 following spine refurbishment (color figure available online).
