Figures & data
Figure 1. Example of recording setup.

Figure 2. Visual representation of the 18 recording sessions (see text for details).
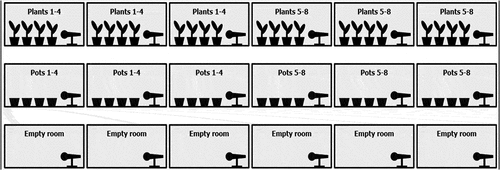
Table 1. Number of unique acceptable UEs in each recording session before excluding all non-significant UEs.
Table 2. Number of unique acceptable UEs in each recording session after excluding all non-significant UEs.
Table 3. Comparison between the two iterations (manual and automatic) of the threshold procedure. Both iterations were applied on all 72 files described in this paper.
Figure 3. Waveform view of the whole ultrasound band (20–192 kHz) of a recording session. The horizontal axis represents time (0–30 min.) and the vertical axis represents the sound level (dB FS). No UE peaks can be identified due to the background noise.

Figure 4. From each recording session, 4 ultrasonic frequency bands were extracted (20–40 kHz; 40–60 kHz; 60–80 kHz, 80–100 kHz).
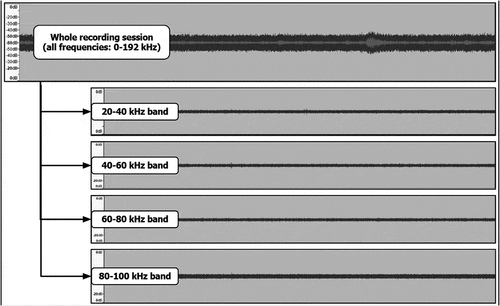
Figure 5. Waveform view of a 20 kHz-wide band extracted from a recording session. The horizontal axis represents time (0–30 min.) and the vertical axis represents the sound level (dB FS). Potential UE peaks (vertical lines) can be easily spotted thanks to the lower background noise.

Figure 6. Visual representation of the manual procedure used to identify potential UEs (see text). The horizontal axis represents time and the vertical axis represents the sound level (dB FS).
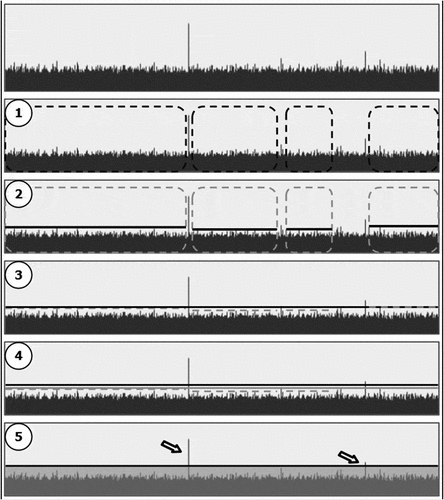
Figure 7. Visual representation of the automated procedure used to identify potential UEs (see text). The horizontal axis represents time and the vertical axis represents the sound level (dB FS).
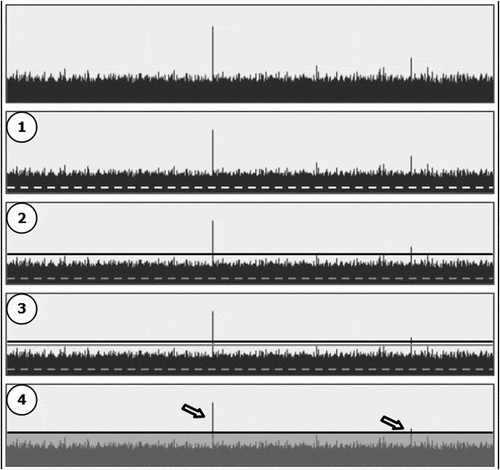
Figure 8. Examples of UE peaks that were excluded for different reasons (see text).
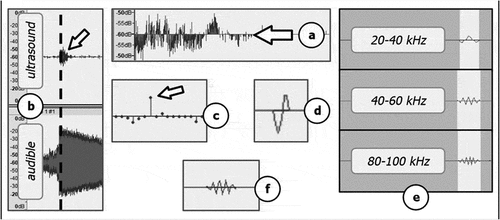
Figure 9. Number of UEs in each recording session, (a) before and (b) after excluding all non-significant UEs. Each column represents one of the 18 recording sessions, and the vertical axes represents the number of UEs found in that recording session. The UEs in (b) were considered acceptable for statistical analysis purposes.
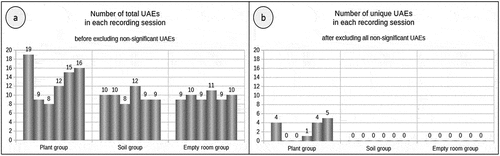
Figure 10. Difference between the automatic procedure and the manual procedure in identifying potential UE peaks. In most of the 72 files the difference is 0, therefore the two procedures identified the same peaks. Where the difference is +1, the automatic procedure identified one more peak than the manual one. Where the difference is −1, the manual procedure identified one more peak than the automatic one. The two procedures never differed by more than one peak.
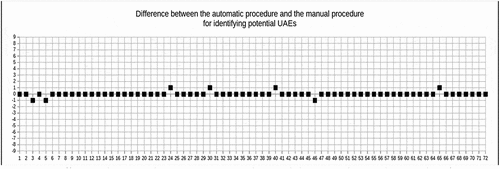
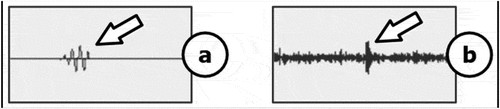
Figure 11. Example of (a) a short timescale UE (< 1 ms) and (b) a long timescale UE (several ms or tens of ms) at different zoom levels.