Figures & data
Figure 1 Physical principles for deforming a mirror with out-of-plane linear actuation. (a) Piezo-stacked actuators, (b) voice-coil magnetic actuators, (c) electrostatically-actuated MEMS mirror, and (d) electrostatically actuated membrane mirror. (Figure is provided in color online.).
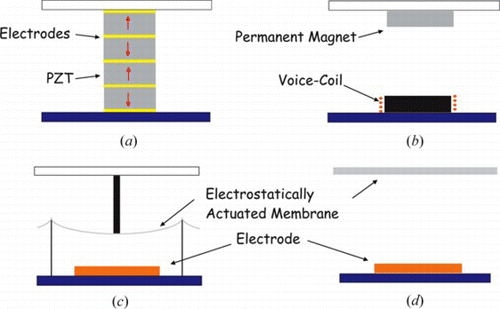
Figure 2 Principle of bimorph actuation. (a) Two active layer bimorph mirror and (b) monomorph mirror. The shape induced results from the application of a positive voltage to the left addressing electrode, and a negative voltage to the right one. (Figure is provided in color online.).
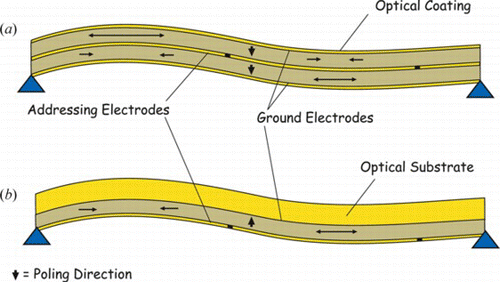
Figure 3 Segmented bimorph mirror: CAD view of a group of seven segments on its support structure. (Figure is provided in color online.).
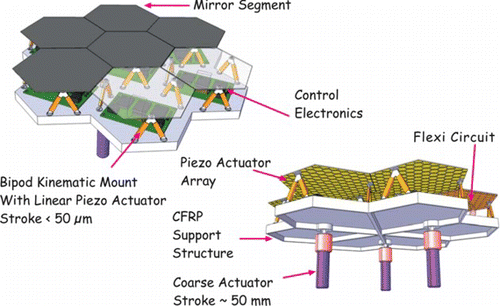
Figure 4 Numerical procedure for simulating the morphing of a segmented bimorph mirror.
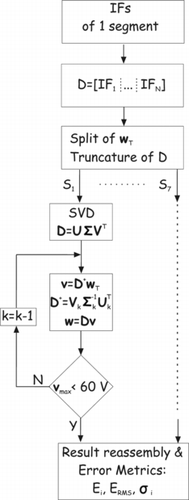
Figure 5 RMS error produced for the generation of Zernike modes up to order 8. Comparison between segmented bimorph mirrors and monolithic bimorph mirror. The values are relative to the RMS value of each mode. (Figure is provided in color online.).
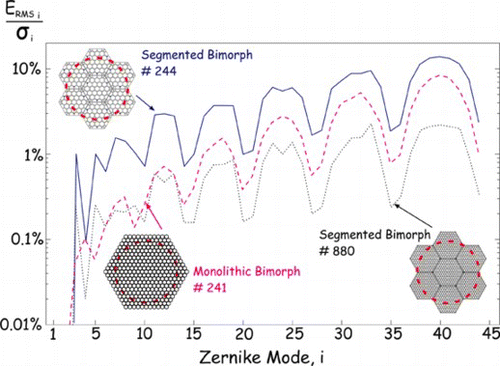
Figure 6 Comparison of the actuator layouts of (a) one segmented and (b) one monolithic bimorph mirror. Each segment of the assembly in (a) contains 43 PZT pactches and three linear actuators, totalizing 322 actuators, of which about 244 lie within the active optical aperture. The monolithic layout (b) consists of a honeycomb with 331 actuators, with about 241 inside the active aperture. (Figure is provided in color online.).
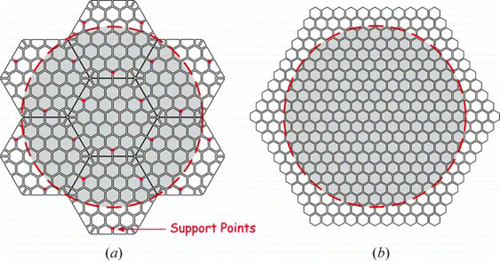
Figure 7 Generation of Defocus. (a) Segmented bimorph and (b) monolithic bimorph. Generated shape (top) and error committed (bottom) when employing a segmented bimorph mirror (left) and a monolithic bimorph mirror (right), with the layouts represented in Figure 6. The steps between contours are different for each plot. (Figure is provided in color online.).
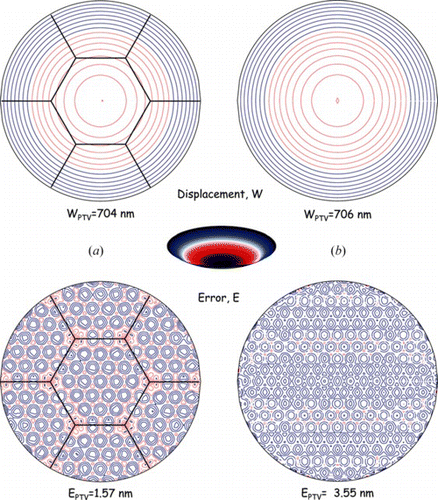
Figure 8 Generation of Astigmatism. (a) Segmented bimorph and (b) monolithic bimorph. Generated shape (top) and error committed (bottom) when employing a segmented bimorph mirror (left) and a monolithic bimorph mirror (right), with the layouts represented in Figure 6. The steps between contours are different for each plot. The inter-segment region within the box is magnified in Figure 9, where the reduction of the error is shown for an increased refinement of the actuator array. (Figure is provided in color online.).
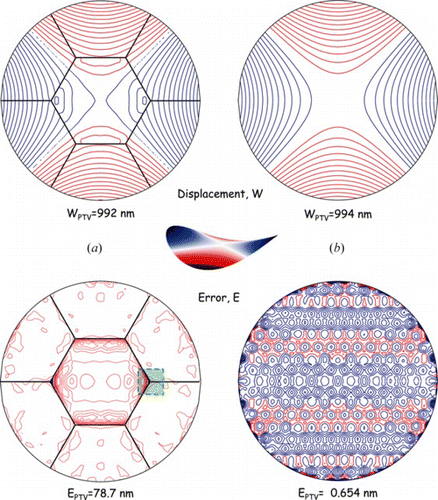
Figure 9 Reduction of the error at the segment edge by consecutive refinement of the actuator array: (a) 244 actuators, (b) 880 actuators, and (c) 1696 actuators. (a) is the same as the layout (a) in Figure 8. The contour step is equal to 2.62 nm in the three cases. (Figure is provided in color online.).
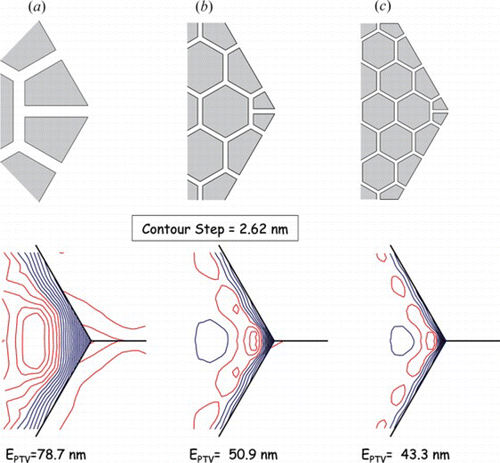
Figure 10 Generation of purely radial Zernike mode of the eighth order. (a) Segmented bimorph and (b) monolithic bimorph. Generated shape (top) and error committed (bottom) when employing a segmented bimorph mirror (left) and a monolithic bimorph mirror (right), with the layouts represented in Figure 6. The steps between contours are different for each plot. (Figure is provided in color online.).
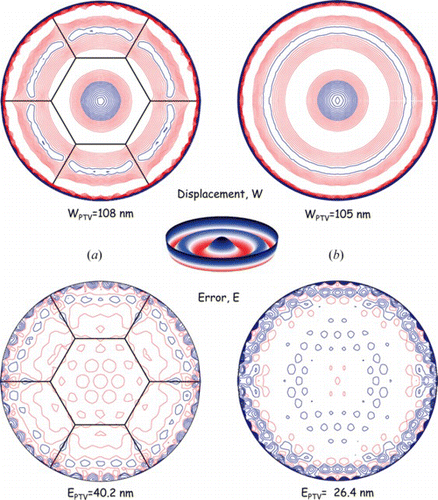
Figure 11 Detail of the generation of high order coma (mode #17), showing the smoothing of the shapes between the segments for different layouts of actuators. Figures (a), (b), and (c) correspond to a gradual refinement of the actuators. (Figure is provided in color online.).
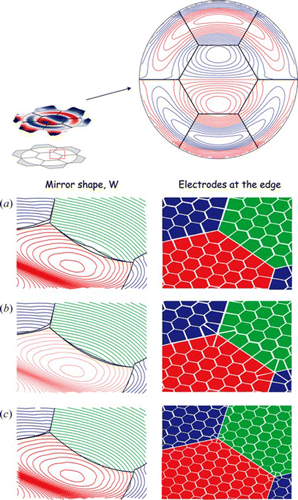
Figure 12 Correction of the first turbulent screen of the ensemble, for observations at λ = 2.2 µm in the VLT. Target shape, which corresponds to half of the aberrated wavefront, shapes effectively imposed to the segmented bimorph (left) and monolithic bimorph (right), and respective uncorrected residuals. The segmented bimorph shows a higher residual at the edges of the segment, but due to its concentrated character its impact in the error RMS is smoothed. (Figure is provided in color online.).
