Figures & data
Figure 1. Study area. The red rectangle indicates the mapped area.
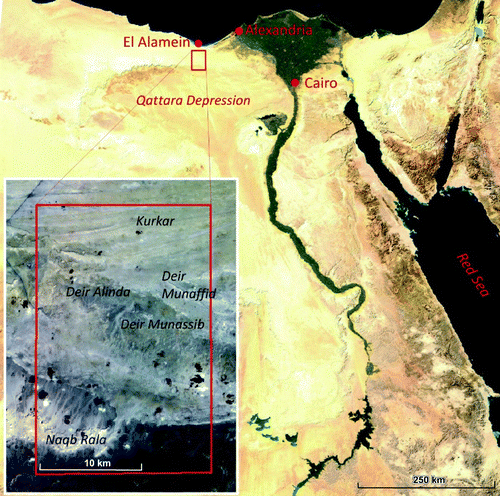
Figure 2. Military map of the El Alamein's battlefield before the third and final battle of El Alamein (23 October 1942). The white rectangle indicates the surveyed area. Red units belong to Allied Forces, blue units to Axis forces. Legend: IT, Italy; GE, Germany; UK, United Kingdom; IN, India; SA, South Africa; AU, Australia; NZ, New Zealand; FR, France; XX, Division; X, Brigade; II, Regiment; Crossed box, infantry unit; ellipse, armored unit; crossed box with wings, airborne unit; crossed box with ellipse, mechanized unit; Brown lines, minefields; gray lines, tracks; Green areas, low elevation; red areas, high elevation; Dotted area, main ridge.
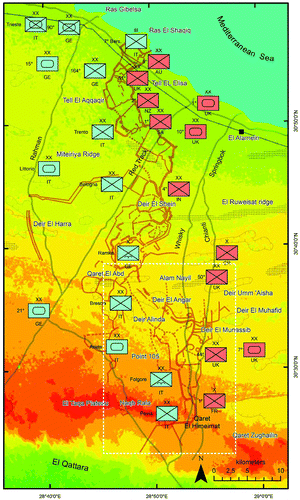
Figure 3. Mesas and cuestas on the El Taqa Plateau, bordering the southern side of the battlefield. The escarpments are approximately 30 m high.
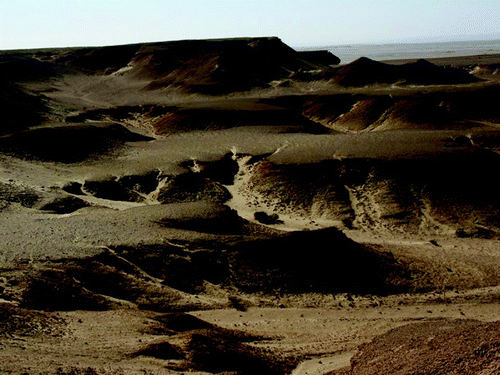
Figure 4. North-oriented Ground Control Points showing the different surface characteristics: (a) hamada ground; (b) serir ground; (c) sandy ground.
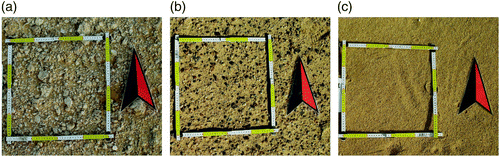
Figure 5. Examples of landforms in the study area: (a) escarpments at the front of the cuestas in Naqb Rala (El Taqa Plateau); (b) the floor of the Deir El Munassib Depression; peripheral scarps can be seen on the horizon; (c) wadi-fan system: the sediments are transported from South to North, forming coalescent cones; (d) network of wadis along the border of Point 105 (Quota 105).
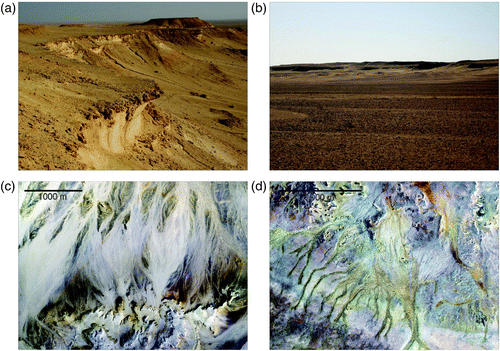
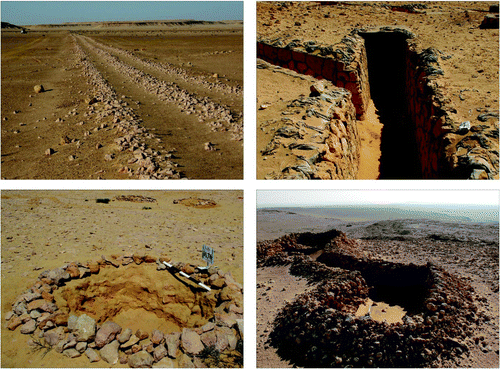
Figure 6. Examples of military remains along the Southernmost sector of the battlefield: (a) the Rommel Track (also known as Red Track), built by the British Army before the war; (b) the entrance to underground fortified chambers at Kaponga Box, which is a British fortress at Qaret El Abd; (c) an Italian foxhole at Point 105 (Quota 105); (d) an Italian observation post along the Southern front to El Qattara Depression.