
Figures & data
Figure 1. A live-cube compact storage system with a lift.

Figure 2. A virtual aisle in a live-cube system.
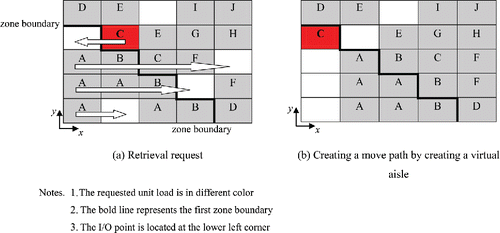
Figure 3. Instances of ABC curves with different values for the skewness parameter.
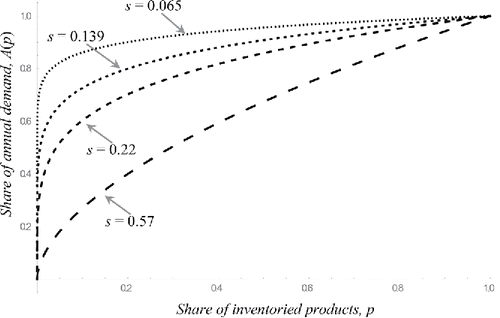
Figure 4. Sub-cases to be optimized individually. R1 represents the first zone closer to I/O point and R2 represents the second zone.
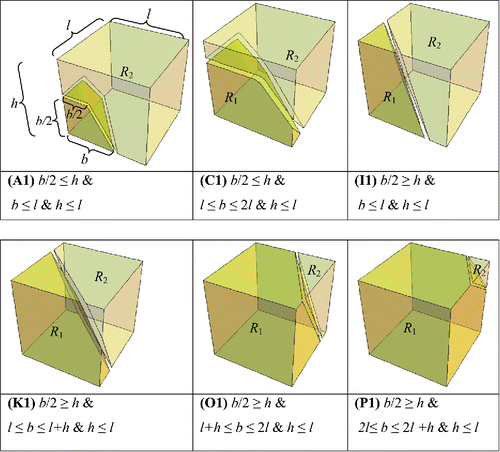
Figure 5. Fitted function b*fit(s) versus optimal values b*(s) for s ≤ s′ in sub-case A1.
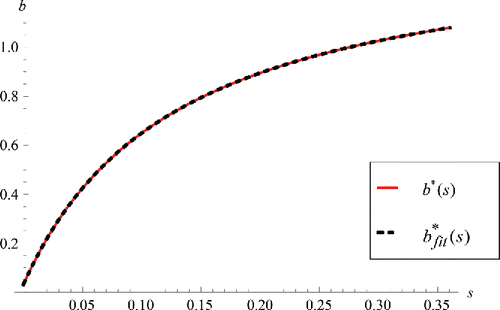
Figure 6. Fitted function b*fit(s) versus optimal values b*(s) for s > s′ in sub-case C1.
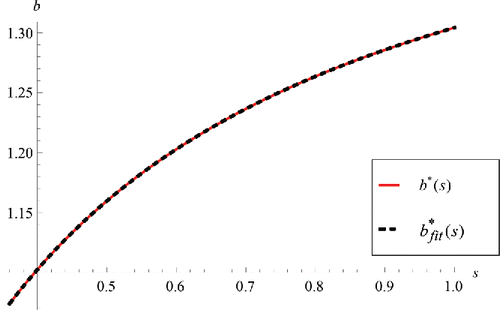
Table 1. The optimal dimensions and zone boundary (in time units) for any s and V.
Table 2. The optimal solutions for some selected skewness parameters (ABC curve).
Figure 7. Optimal dimensions and first zone boundary in time units for different values of s.
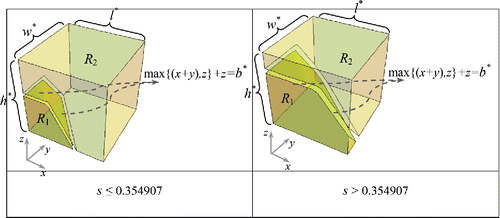
Table 3. Parameters describing storage system and storage policy derived from Hyundai Elevator (Citation2013).
Table 4. The optimal expected retrieval time for the base case.
Table 5. Results of sensitivity analysis when varying skewness parameter.
Table 6. Results of sensitivity analysis when varying system size.Footnote*
Table 7. Results of sensitivity analysis when varying the first zone size.
Table 8. Results of sensitivity analysis when varying the shape factor (length/width in number of tiers).Footnote*
Table A1. The 36 sub-cases, each corresponding to a specific E[T] formula.
Table A2. Optimal solutions of sub-cases I1, K1, O1, P1.
Table A3. Set of possible sub-cases for any given system configuration: (a) configuration 1; (b) configuration 2; (c) configuration 3; and (d) configuration 4.