Figures & data
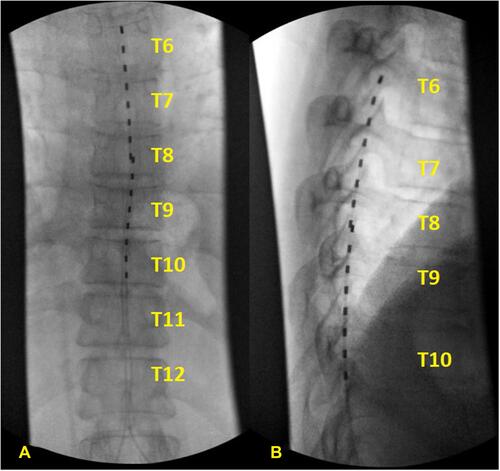
Figure 1 Lead placement, (A) anterior and (B) lateral views.
Notes: Intra-operative fluoroscopy images demonstrate overlapping placement of the spinal cord stimulator leads from (A) anterior and (B) lateral views. The placement of the leads allows coverage from T6 down to T10 for optimal coverage of both back and leg as well as abdominal pain.