Figures & data
Figure 1. Laboratory set-up. (a) Positioning on the radiolucent table with the flat detector 3D C-arm. The Kirschner wire is navigated via a navigated drill guide. The reference marker is attached to the spina scapulae. (b) Screenshot of a navigated AC joint transfixation. The upper left panel shows the aiming trajectory; the other panels show the planned trajectory.
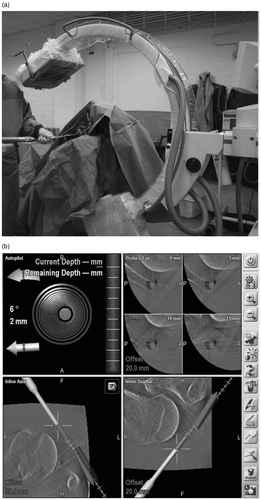
Figure 2. Radiological analysis with the use of the OsiriX software. Multiplanar reformations are created, and the distance of the K-wires from the center of the AC joint is measured.
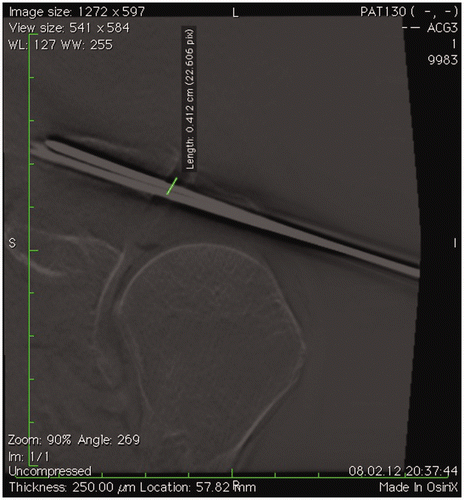
Figure 3. Maximum distance of the K-wires from the center of the AC joint. Statistical analysis revealed significantly lower values in the navigated group.
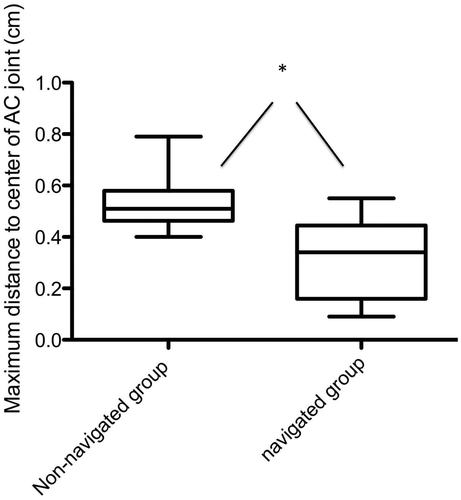
Figure 4. Minimum distance of the K-wires from the center of the AC joint. Statistical analysis revealed significantly lower values in the navigated group.
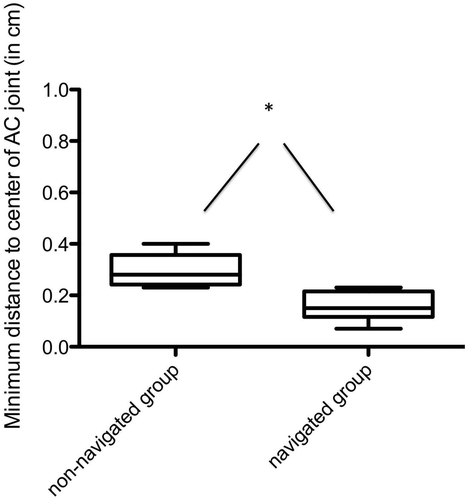
Figure 5. Radiation time in the non-navigated and navigated groups. For the freehand group the radiation time covers only the intraoperative fluoroscopic imaging, while the significantly higher radiation time for the navigated group represents 2D fluoroscopic imaging along with the 3D scan.

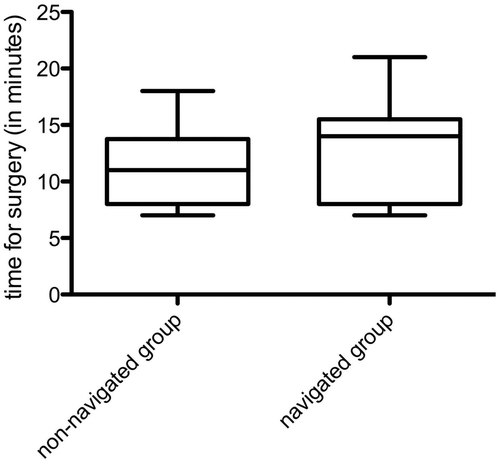
Figure 6. Surgery time in the non-navigated and navigated groups. The comparison revealed no statistical differences. The time for the navigated group included 60 seconds for the 3D scan and approximately 1 minute for the transfer of the 3D data from the 3D C-arm to the navigation system.