Figures & data
Figure 1. Schematic of the half mini DMA (a) main geometry (b) notations for sheath flow parameters.
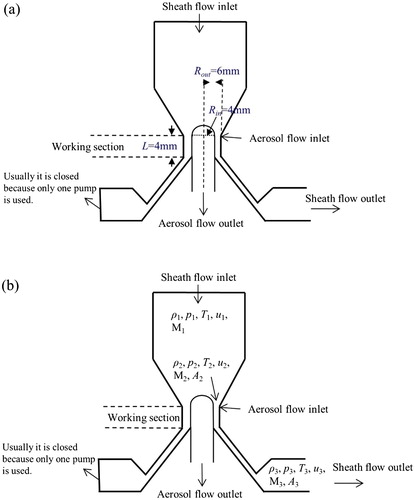
Table 1. Different variables used to understand the flow regime in the working section.
Figure 2. Flow regime in the working section. Black-solid line: Mach number vs. flow rate; Blue-dashed line: velocity vs. flow rate.
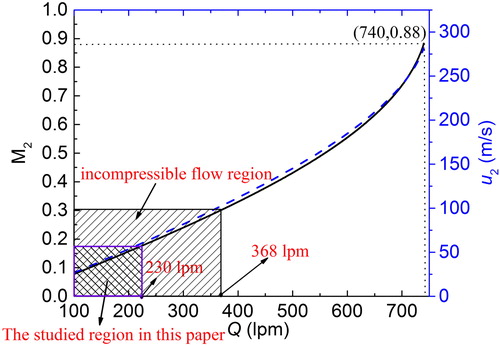
Figure 3. The flow fields of half mini DMA (a) velocity magnitude field below the trumpet, and streamlines shown near the aerosol inlet and outlet slit (q = 9 lpm, Q = 136 lpm) (b) different locations in the working section (c) the axial velocity profile at different z as increasing q (Q = 136 lpm).
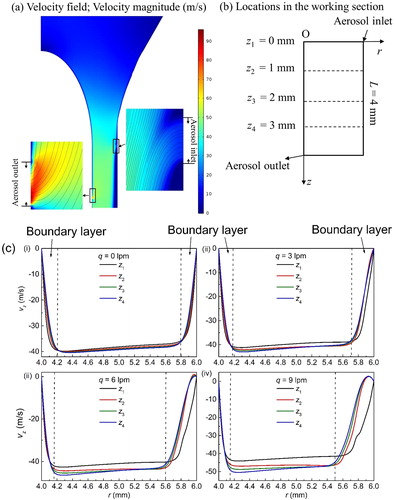
Figure 4. Electric field with the applied voltage (˗300V) on the inner electrode.

Figure 5. Convective flux (mol·m−2·s−1) fields of aerosol with increasing magnitude of the inner electrode voltage in working section (dp = 1.4 nm, q = 9 lpm, Q = 136 lpm).
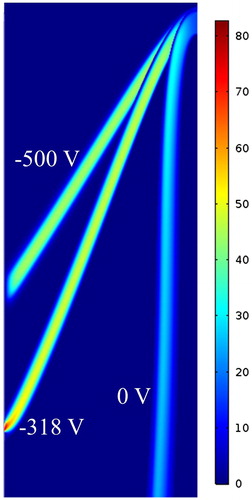
Figure 6. (a) Transfer function vs. voltage for two different values of dp. (b) Comparison between the simulated and experimental peak voltages for different particle diameters.
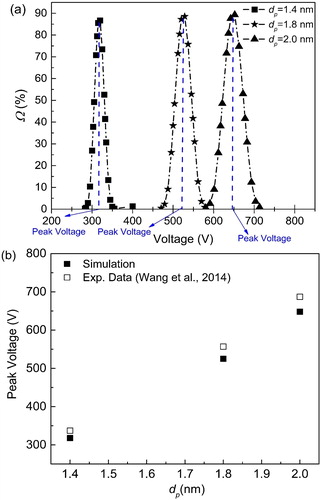
Figure 7. Comparison of transfer function (Ω) between half mini DMA and nano DMA for sub-2 nm particles. Ω only counts the particle transmission in the DMA work section.
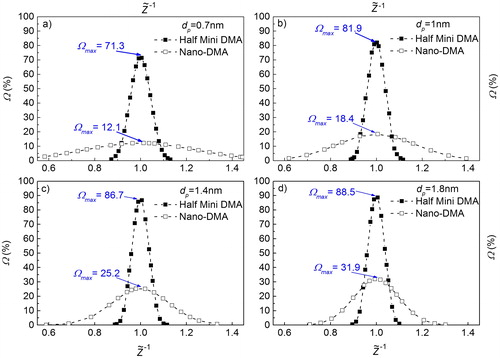
Figure 8. The comparison of resolution (R) of half mini DMA and nano DMA under different particle mobility sizes (q/Q = 9/136).
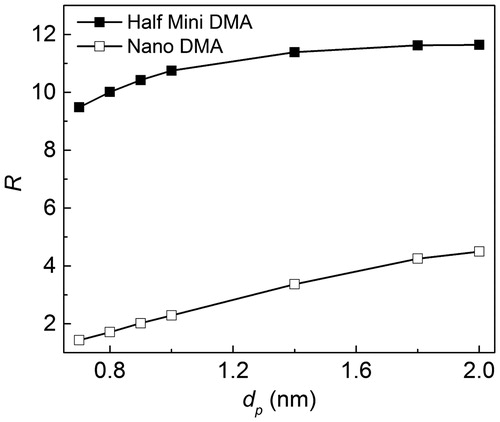
Figure 9. Transfer function vs. voltage for half mini DMA (a) q = 3 lpm (b) q = 5 lpm.
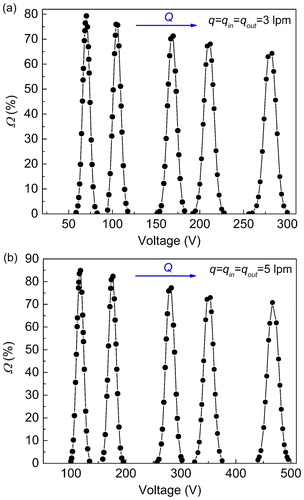
Figure 10. The simulation (half mini DMA) and theoretical transfer function for different q/Q (q = 3 lpm) at dp = 1.4 nm under (a) the non-diffusion theory (Knutson and Whitby Citation1975) (b) the diffusion theory (Stolzenburg Citation1988; Stolzenburg and McMurry Citation2008).
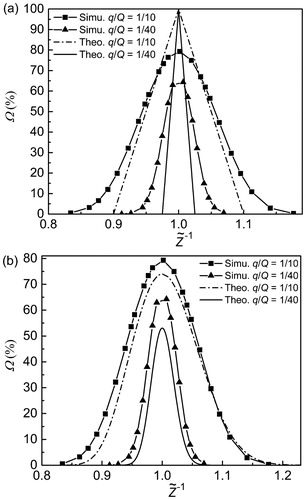
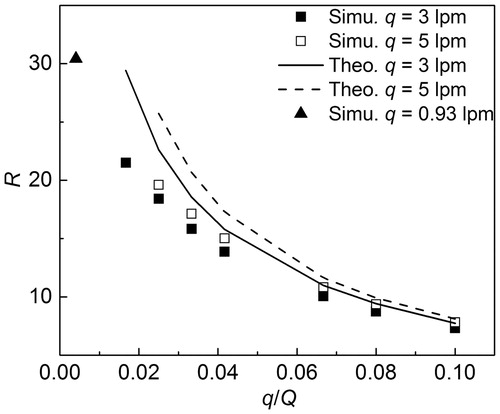
Figure 11. The simulation and theoretical resolution of half mini DMA for different q/Q at dp = 1.4 nm. Note that the simulation point denoted by triangular corresponding to q = 0.93 lpm and Q = 230 lpm.